Have any questions? Contact us!
Join our team!
Request a free quote or consultation

Imagine you’re designing a house. You’ve got this amazing 3D model on your computer – walls, windows, a sleek roof, the works. It looks awesome, but here’s the catch: the builders can’t just take that model and start hammering nails. They need clear, detailed instructions – think blueprints, floor plans, or those zoomed-in sketches showing how a window fits into a wall. That’s where Revit drafting comes in, and it’s a game-changer for architects, engineers, and anyone in construction.
Revit drafting is the process of using Autodesk’s Revit software to create precise 2D drawings and 3D models that guide a project from concept to reality. It’s not just about sketching lines; it’s about building a digital roadmap that everyone on the team – designers, contractors, even the client – can follow. Whether you’re an architect dreaming up a skyscraper or a contractor figuring out how to make it stand, Revit drafting makes sure your vision doesn’t get lost in translation.
Why Revit Drafting Matters
You might be thinking, “Can’t I just use AutoCAD or sketch things out the old-school way?” Sure, you could, but Revit drafting is like trading a bicycle for a sports car. Here’s why it’s such a big deal:
- It Saves You Time: Those auto-updating drawings? They cut hours (or days) off your workflow. Plus, you can save standard details to reuse later, so you’re not reinventing the wheel for every project.
- It’s Crazy Accurate: Revit pulls data straight from the model, so your dimensions, labels, and material lists are always spot-on. Fewer mistakes mean fewer headaches on the job site.
- It Keeps Things Consistent: Ever seen a set of drawings where the lines or text look all over the place? Revit’s view templates ensure every drawing looks clean and professional, like they all came from the same playbook.
- It’s a Team Player: Architects, engineers, and contractors can all work from the same Revit model. This coordination catches problems – like a pipe running through a beam – before they mess up construction.
Powerkh: Elevating Your Revit Drafting Projects

At Powerkh, we’re all about making your Revit drafting projects faster, smarter, and more efficient. As a trusted BIM and Virtual Design & Construction (VDC) provider, we’ve delivered different projects across the US, UK, and Europe. Our team of expert BIM professionals uses Autodesk Revit to turn your ideas into precise, buildable plans that keep your team on track. Here’s how we can power up your drafting workflow.
We know Revit drafting is about creating clear 2D drawings and data-rich 3D models that guide construction. Whether it’s a residential remodel or an industrial complex, we deliver tailored solutions with quick turnarounds. Clients like Michael Curry of Curry & Associates praise our tracking system for design changes, while Petr Štěpán values our professionalism. With Powerkh, you get innovative Revit drafting that boosts productivity and cuts costs.
Our key Revit drafting services include:
- 3D BIM Modeling & 2D Drawings: We create detailed models (up to LOD 500) and 2D plans like floor plans or sections, ensuring accuracy for architects and contractors.
- Clash Detection: Using Revit, we spot conflicts – like pipes clashing with beams – early, saving you rework, as seen in our New York projects.
- BIM Automation: We use Dynamo scripts to automate tasks like wall framing, speeding up drafting by up to 500%, as we did for a California client.
- Scan-to-BIM: We convert point cloud data into Revit models and 2D as-built drawings, perfect for renovations, with free updates for peace of mind.
- Shop Drawings & Revit Families: We craft custom components and fabrication-ready drawings, supporting seamless prefab workflows.
So, What Exactly Does Revit Drafting Do?

Revit drafting is the secret sauce that turns your wildest design ideas into plans that builders can actually follow. Using Autodesk’s Revit software, a rockstar in the Building Information Modeling (BIM) world, you create a 3D model packed with details – wall heights, material types, even how much load a beam can take. But the real magic happens when you spin that model into 2D drawings like floor plans, sections, or super-specific sketches, like how a roof seals to a wall. It’s about giving everyone on the project – architects, engineers, contractors – a clear, no-guesswork guide to bring your vision to life. Let’s break down how it works and why it’s so powerful.
Creating a Data-Rich 3D Model
Revit drafting starts with a 3D model that’s way more than a pretty visual. This model is like a digital twin of your building, stuffed with info – think exact dimensions, material specs like concrete or glass, and even performance data, like insulation values. Whether you’re designing a cozy house or a sprawling office tower, this model is your project’s brain. You can add walls, windows, doors, HVAC systems, you name it, and Revit keeps track of every detail. This sets the stage for drafting, letting you pull precise 2D drawings straight from the model without starting from scratch. It’s like having a blueprint that’s already half-done before you even pick up a (digital) pencil.
Generating Smart 2D Drawings
Here’s where Revit drafting really flexes its muscles. From that 3D model, you can create 2D drawings – floor plans, elevations, cross-sections, or zoomed-in details like how a steel beam connects to a column. These aren’t just static sketches; they’re “live” drawings tied to the model. Say you decide to widen a doorway in the 3D model. Revit instantly updates every related drawing – your floor plan shows the new door size, your elevation adjusts, and your section view reflects the change. No more tedious redrawing or crossing your fingers that you caught every update. This real-time sync saves hours and keeps errors low, so contractors aren’t scratching their heads over mismatched plans on-site.
Crafting Custom 2D Details
Not every detail needs to come from the 3D model, and Revit’s got you covered there too. Sometimes, you need a quick 2D sketch for something standard, like a typical window flashing or a roof drain setup you use on every job. Revit’s drafting views are like a digital sketchbook where you can draw these details from the ground up. You’ve got tools like detail lines for clean outlines, filled regions to shade materials (like insulation or brick), and text notes to call out specifics, like “add sealant at joint.” These standalone drawings are easy to save and reuse, so you can build a library of your best details to drop into future projects. It’s like having a stash of your greatest hits, ready to make every job faster and sharper.
Using Revit’s Drafting Toolkit
Revit’s drafting tools are what make your drawings pop and keep things clear for everyone on the team. You can add smart dimensions that auto-update if you shift a wall, or drop in pre-made components – like bolts, anchors, or insulation – from Revit’s library to save time. Need to show what’s wood versus plaster? Use hatch patterns to make it obvious at a glance. You can also tag elements with notes that pull data straight from the model, like “Wall: 6-inch concrete block” or “Beam: W10x22.” These tools let you create drawings that are precise, professional, and easy to read, whether you’re guiding a contractor on a roof detail or showing an engineer where to place a pipe.
Bridging Design and Construction
Revit drafting isn’t just about making pretty pictures; it’s about making sure your design actually gets built right. Those 2D drawings and 3D models are the language that connects designers with builders. For example, an architect might use Revit to draft a floor plan, while an MEP engineer pulls from the same model to map out plumbing lines. Because everything’s linked, you can spot problems – like a duct running through a structural beam – before construction starts. This coordination, paired with Revit’s ability to produce detailed, data-driven drawings, means fewer surprises on-site, less rework, and a smoother path from your sketch to a finished building.
In essence, Revit drafting is your all-in-one tool for turning a concept into reality. It combines the power of a data-packed 3D model with the clarity of 2D drawings, giving you the best of both worlds. Whether you’re churning out live drawings that update on the fly or sketching custom details to nail a specific connection, Revit drafting keeps your project moving fast, accurate, and in sync. It’s like having a superpower that makes sure your vision doesn’t just stay on your screen – it becomes a real building everyone can walk through.
Who Uses Revit Drafting?
Revit drafting is a go-to for anyone in the architecture, engineering, and construction (AEC) world. Here’s how different pros put it to work:
- Architects: They create floor plans, elevations, and detailed views to show exactly how a building comes together, making sure the design is both beautiful and buildable.
- Structural Engineers: They draft beams, columns, and foundations, using Revit’s tools to test if the structure can handle the load.
- MEP Engineers: These folks design heating, electrical, and plumbing systems, ensuring everything fits and runs efficiently.
- Contractors: They rely on Revit’s construction documents to understand what to build and avoid costly mix-ups.
- Interior Designers: They use Revit to plan layouts and visualize spaces with furniture and finishes, helping clients see the final look.
Even project managers and building owners benefit, using Revit’s drawings to track progress or maintain the building after it’s done.
Tips to Get Started with Revit Drafting
If you’re new to Revit drafting, don’t worry – it’s easier than it sounds. Here are a few pointers to hit the ground running:
- Name Your Views Clearly: Instead of “View 1,” try “Roof-Wall Detail.” It’ll save you from digging through a mess of files later.
- Use View Templates: These keep your drawings looking sharp and consistent without tweaking settings every time.
- Build a Detail Library: Save your go-to details, like window sections, to reuse on future projects. It’s a huge time-saver.
- Don’t Over-Model: Skip modeling every tiny screw in 3D. Draw small stuff in 2D to keep your model lean.
- Lean on Manufacturer Details: Many companies share drawings for their products. Simplify them in Revit to match your project’s needs.
Conclusion
Revit drafting is like having a superpower for your building projects. It blends the wow-factor of 3D modeling with the nitty-gritty details of 2D drawings, all in one place. Whether you’re sketching a floor plan, coordinating with engineers, or helping contractors bring a design to life, Revit makes the process faster, smarter, and way less stressful. So, if you’re in the AEC world, don’t sleep on Revit drafting – it’s the tool that ties your vision together and makes sure everyone’s on the same page.
Ready to dive in? Grab Revit, play around with its drafting tools, and watch your projects go from good to great.
FAQs
1. What’s the difference between Revit drafting and traditional drafting methods?
Revit drafting uses Autodesk’s Revit software to create 2D drawings and 3D models that are interconnected, unlike traditional methods like hand-drawing or using AutoCAD, where drawings are standalone. With Revit, if you change a 3D model (say, move a wall), all related 2D drawings – like floor plans or sections – update automatically. This saves time, reduces errors, and keeps everything consistent, compared to manually updating each drawing in traditional methods.
2. Do I need to model every detail in 3D for Revit drafting?
Nope! Revit’s flexible. You can create detailed 3D models for big elements like walls or roofs, and Revit will generate 2D drawings from them. But for smaller, standard details – like a door frame or flashing – you can use drafting views to sketch 2D drawings from scratch without modeling them in 3D. This keeps your model lightweight and lets you reuse those 2D details across projects, making your workflow faster.
3. How does Revit drafting help with collaboration on a project?
Revit drafting shines in teamwork. Since all drawings and models are linked in one Revit file, architects, engineers, and contractors can work from the same data. For example, an architect’s floor plan and an engineer’s plumbing layout stay in sync, so you can catch issues – like a pipe clashing with a beam – early through clash detection. This coordination cuts down on miscommunication and costly fixes during construction.
4. What kind of drawings can I create with Revit drafting?
Revit drafting covers a wide range! You can generate 2D drawings like floor plans, elevations, sections, and detailed views (e.g., how a window fits into a wall) directly from the 3D model. You can also create standalone 2D sketches for things like roof details or material connections using drafting views. Plus, Revit supports schedules, material takeoffs, and even realistic renderings, giving you everything from construction docs to client visuals.
5. Is Revit drafting only for architects, or can other professionals use it?
Revit drafting is for the whole AEC crew! Architects use it for floor plans and design details, structural engineers draft beams and foundations, and MEP engineers map out HVAC or plumbing systems. Contractors rely on Revit’s drawings to build accurately, interior designers plan layouts, and even project managers use them to track progress. Its versatility makes it a go-to for anyone involved in designing, building, or managing a project.
Our Case Studies
We have handled 200+ BIM & VDC projects for commercial, industrial, and residential sectors.
Our work includes:
Formwork design automation
Our client from
California, USA
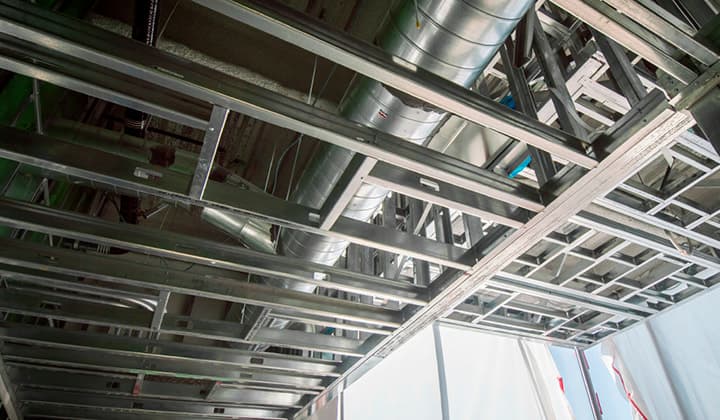
Suspended ceiling design automation
Our client from
New York, USA
Wall framing design automation
Our client from
California, USA