Have any questions? Contact us!
Join our team!
Request a free quote or consultation

Revit for architecture is Autodesk’s Building Information Modeling (BIM) software that enables architects to design, document, and collaborate on building projects in a single 3D environment. According to the official Autodesk documentation, the platform combines modeling, visualization, coordination, and documentation capabilities to streamline architectural workflows from conceptual design through construction documentation.
Revit has become the industry standard for architectural design and Building Information Modeling. But here’s the thing—mastering it isn’t about memorizing every command.
It’s about understanding how architects actually work with the software to create buildings that move from concept to construction.
This guide breaks down the essential workflows, tools, and techniques based on Autodesk’s official resources and real-world architectural practice.
Understanding Revit's Role in Architectural Design
Revit isn’t just another CAD program. It’s fundamentally different from traditional drafting software.
The software operates on a parametric modeling system where every element is interconnected. Change a wall in one view, and that modification appears everywhere—plans, sections, elevations, schedules, and 3D views.
According to Autodesk’s official certification materials, Revit addresses architectural design workflows, processes, and project objectives through an integrated modeling environment. This approach differs from the fragmented workflow of separate 2D drawings.
The BIM Advantage
Building Information Modeling represents more than 3D visualization. The model contains comprehensive data about materials, costs, schedules, and spatial relationships.
Community discussions on buildingSMART forums highlight how IFC standards enable interoperability between Revit and other BIM platforms. Architects share models with engineers, contractors, and consultants who work in different software environments.
That said, implementing BIM requires understanding both the technical aspects and the collaborative workflows that make it effective.
Use an External Team for BIM Production Work

Powerkh acts as a BIM partner for construction teams that need reliable support for modeling, coordination, and documentation. The company helps handle the technical side of project delivery across different stages.
Need a Team to Support BIM Work?
Talk with Powerkh to:
- handle BIM modeling and documentation
- support coordination across disciplines
- add stable BIM capacity to your projects
👉 Contact Powerkh for a project review and consultation.
Getting Started with Revit's Interface
The Revit interface follows a ribbon-based structure similar to other Autodesk products. But the logic behind it reflects architectural thinking.
Autodesk’s Quick Start Guide emphasizes understanding the interface tour as the foundation for efficient work. The ribbon organizes tools by architectural tasks rather than generic drawing functions.
Essential Interface Components
The Project Browser sits on the left. It’s the navigation hub for all views, schedules, sheets, and families in the project.
The Properties palette on the right displays parameters for selected elements. This is where architects adjust dimensions, materials, and constraints.
The drawing area occupies the center. But unlike CAD software, what appears here depends on the active view—plan, section, elevation, 3D, or schedule.
Real talk: spend time understanding view types before diving into modeling. The view controls how elements appear and what can be modified.
Core Architectural Modeling Workflows
According to Autodesk’s official tutorials, architectural modeling in Revit follows a logical sequence that mirrors how buildings are actually constructed.
Establishing Project Setup
Every Revit project starts with fundamental parameters. Project location, units, and levels form the framework for everything else.
Levels define floor elevations and control where walls, floors, and other elements exist vertically. Change a level height, and associated elements adjust automatically.
Grids establish the structural and planning framework. They serve as reference lines for column placement and spatial organization.
Wall Layout and Design
Walls represent the primary architectural element in most projects. Autodesk’s curated tutorials emphasize wall layout, design, and editing as fundamental skills.
Revit walls contain layers representing actual construction assemblies. A typical exterior wall includes structure, insulation, sheathing, and finishes—each layer with specific thickness and material properties.
Community discussions on buildingSMART forums note variations in how Revit exports walls to IFC format. Some walls export as IfcWall while others become IfcWallStandardCase depending on complexity and connections.
Here’s what matters for architectural practice: understanding wall types, constraints, and how they interact with other elements.
Doors, Windows, and Openings
These elements work differently than in CAD. They’re hosted components that attach to walls and automatically cut openings.
Select a door family, click a wall, and Revit handles the geometry. The door appears in plan, elevation, section, and 3D views simultaneously.
Parameters control swing direction, dimensions, materials, and hardware. Modify these in the Properties palette or by editing the family itself.
Creating and Modifying Building Elements
Revit’s Architecture tab contains tools organized by building component type. The logic follows construction sequence.
| Element Category | Primary Use | Key Considerations |
|---|---|---|
| Walls | Vertical enclosures and partitions | Layer composition, height constraints, joins |
| Floors | Horizontal structural surfaces | Slope, boundaries, structural vs. architectural |
| Roofs | Building envelope top surface | Pitch, eaves, drainage, assembly layers |
| Stairs | Vertical circulation | Code compliance, run/rise, landings |
| Railings | Safety barriers | Height regulations, baluster spacing |
| Ceilings | Overhead finish planes | Height offset, lighting integration |
Floor and Roof Systems
Floors and roofs use sketch-based creation. Draw a boundary, define the assembly, and Revit generates the element.
These elements can slope for drainage, have openings for stairs or shafts, and attach to walls with automatic cleanup at intersections.
Layer composition works like walls—structural deck, insulation, membrane, finish layers all specified with materials and thickness.
Stairs and Railings
Stairs follow building codes automatically when configured properly. Specify maximum rise, minimum run, and Revit calculates the geometry.
The stair tool offers component-based or sketch-based methods. Component stairs assemble from runs, landings, and supports. Sketch stairs provide more geometric freedom.
Railings attach to stairs, ramps, floors, and roofs. They’re path-based elements that follow edges and adjust to slope changes.
Working with Families and Components
Families are Revit’s parametric building blocks. Everything in a project—from walls to furniture—exists as a family.
System families (walls, floors, roofs) are built into the project environment. Loadable families (doors, windows, furniture, equipment) exist as separate RFA files that import into projects.
Autodesk’s official documentation organizes families in the Project Browser under the Families node. This structure shows all loaded family types and their variations.
Loading and Placing Families
The Insert tab provides access to the Load Family command. Browse to RFA files and bring them into the project.
Once loaded, families appear in the Architecture tab or Systems tab depending on category. Select the tool, configure the type, and place instances in the model.
Parameters define family behavior. Type parameters apply to all instances of that type. Instance parameters vary for each placed element.
Creating Custom Families
Custom families start from templates that define category and behavior. Door templates create doors, furniture templates create furniture.
The Family Editor provides a separate environment for building parametric components. Reference planes, parameters, and constraints control geometric relationships.
Look, creating families requires understanding parametric relationships and geometric constraints. It’s a deeper skill that builds on basic modeling competency.
Views, Visualization, and Documentation
Views in Revit aren’t separate drawings—they’re different perspectives of the same building model.
Creating and Managing Views
The View tab contains tools for creating new perspectives of the model. Floor plans generate from levels. Sections and elevations cut through the model at specified locations.
3D views offer either perspective or orthographic projection. Camera views simulate human vantage points for presentations.
View templates control visibility, graphic appearance, and view properties consistently across multiple views. Apply a template, and all assigned views inherit those settings.
Visibility and Graphic Overrides
According to Autodesk’s help documentation, visibility and graphic display in project views represents a critical skill for effective communication.
Visibility and graphic display are managed via the Unified Graphics Manager, which integrates legacy VG settings with real-time render overrides. This dialog controls which categories appear, their line weights, patterns, and transparency.
Filters enable graphic overrides based on parameter values. Show all exterior walls in red, or highlight rooms by department with color coding.
Annotations and Dimensions
Annotations exist in specific views, not the model itself. Dimensions, text, tags, and detail components annotate views for documentation.
Dimensions can be temporary (for quick reference) or permanent (for construction documents). Aligned, linear, radial, and angular dimensions handle different geometric conditions.
Tags display parameter values for elements. Room tags show room names and numbers. Door tags display mark values. Wall tags indicate type designations.
Sheets and Construction Documentation
Sheets represent the final construction document pages. They contain title blocks and viewports that display model views.
Creating sheets starts with loading a title block family. The title block contains project information fields that populate automatically from project parameters.
Drag views from the Project Browser onto sheets. They become viewports—windows into the model positioned on the page.
Sheet Organization
Sheet numbers and names follow standard architectural numbering systems. A-101 for architectural floor plans, A-201 for building sections, A-301 for wall sections.
The Sheet List schedule tracks all sheets in the project. It updates automatically as sheets are added, removed, or modified.
Revisions track design changes through the documentation process. Revision clouds highlight modified areas, and revision schedules on title blocks document the change history.
Collaboration and Worksharing
Worksharing enables multiple team members to work on the same Revit project simultaneously. It’s essential for larger projects where architects, designers, and drafters collaborate.
Projects primarily utilize cloud-based collaboration via Autodesk BIM Collaborate Pro, where the central model resides in a unified cloud environment with real-time syncing.
Worksets
Worksets divide the project into logical sections. One team member works on the building shell while another develops interior layouts.
Elements are assigned to worksets—shell, core, interiors, site, annotation. Team members borrow worksets or individual elements for editing.
Synchronize with Central pushes local changes to the central model and retrieves updates from other team members.
Project Coordination
Linked models bring together architecture, structure, and MEP disciplines. Each discipline maintains their own model, linked into a composite coordination model.
Copy/Monitor tracks selected elements between linked models. When a structural engineer moves a grid or level, the architectural model receives a coordination warning.
Interference checking identifies conflicts between disciplines. Architectural ducts clash with structural beams, generating reports for resolution.
Integration with Other Autodesk Tools
Autodesk’s official tutorials cover communicating design intent by taking Revit models to 3ds Max for visualization. The workflow exports geometry while maintaining material assignments.
AutoCAD integration works bidirectionally. Import CAD files as underlays for tracing. Export Revit views to DWG format for consultants who don’t use Revit.
Navisworks handles large multi-discipline coordination. It merges Revit models from all disciplines for clash detection, 4D scheduling, and construction sequencing.
Learning Resources and Certification
Autodesk provides extensive official learning materials for Revit. The Quick Start Guide offers curated tutorials covering fundamental workflows.
According to Autodesk’s certification page, the Autodesk Certified Professional in Revit for Architectural Design exam validates advanced skills and comprehensive knowledge of architectural workflows.
| Resource Type | Best For | Source |
|---|---|---|
| Quick Start Guide | First-time users | Autodesk official tutorials |
| Skill-builder courses | Specific techniques | Autodesk Learning platform |
| Revit Fundamentals | Educators | Free 18-hour online course |
| Certified Professional prep | Career advancement | Official certification materials |
| Help documentation | Reference and troubleshooting | help.autodesk.com |
| Forums | Community support | forums.autodesk.com |
Autodesk Revit Fundamentals Course
Autodesk offers Revit Fundamentals as a free course aimed at training educators. The 18-hour online course covers how to use, teach, and implement Revit in educational settings.
Authorized Training Centers
For instructor-led training, Autodesk maintains a network of Authorized Training Centers. These facilities provide hands-on courses with certified instructors.
Training options range from introductory workshops to advanced specialized courses in specific workflows like healthcare design or sustainable design documentation.
Best Practices for Architectural Workflows
Autodesk’s official best practices documentation emphasizes several key principles for effective Revit use.
Model Organization
Consistent naming conventions prevent confusion. Wall types, family names, view names, and sheet numbers should follow clear, logical patterns.
View templates maintain graphic consistency. Create templates for plans at different scales, sections, and details.
Purge unused families, views, and elements periodically. File size impacts performance, particularly in worksharing environments.
Performance Optimization
Detail level affects model performance. Coarse detail for early design, Medium for design development, Fine for construction documents.
View range controls what elements appear in plan views. Properly configured view ranges prevent unnecessary geometry calculation.
Linked models should be unloaded when not needed. Keep only necessary links active to reduce memory consumption.
Parametric Modeling Strategy
Constraints control geometric relationships. Use alignment, offset, and equality constraints intentionally—over-constraining creates problems.
Reference planes establish design intent. They define axes of symmetry, module spacing, and critical alignments.
Parameters enable design flexibility. Create project parameters for custom data tracking, type parameters for family variations.
Common Challenges and Solutions
Based on community discussions across Autodesk forums, several challenges appear consistently for architects learning Revit.
Element Behavior Issues
Walls that won’t join cleanly often result from layer misalignment or structural vs. architectural wall conflicts. Edit wall structure to align core layers.
Rooms that won’t calculate area typically have boundary gaps. Use the room separator line or adjust wall settings to close boundaries.
Stairs that violate code parameters need run/rise adjustment or landing reconfiguration. The stair tool highlights violations but requires manual correction.
View Representation Problems
Elements disappearing in views usually relate to visibility settings, view range, or phase assignment. Check VG settings and view properties.
Dimensions not displaying properly often result from dimensioning to non-visible geometry. Adjust visibility or reference different element faces.
Section cuts showing unexpected geometry indicate incorrect crop region or far clip settings. Modify section properties to control depth.
Performance Degradation
Slow model response often relates to view complexity, detail level, or linked file overhead. Simplify active views and unload unnecessary links.
Synchronization delays in worksharing indicate network issues or excessive local changes. Synchronize more frequently with smaller change sets.
File corruption risks increase with improper shutdown or network interruptions. Always use Save and Synchronize, never force-close Revit during operations.
Advanced Architectural Techniques
Once basic modeling competency develops, advanced techniques enable more sophisticated design approaches.
Conceptual Massing
The Massing & Site tab provides tools for early conceptual design. Mass forms use solid and void operations to explore building volumes.
Mass floors divide masses into levels for area calculations. These support early programming and feasibility studies.
Face-based families attach to mass surfaces. Place curtain systems, roofs, or floors on mass faces to develop design from concept to detail.
Adaptive Components
Adaptive families use adaptive points that attach to references in the project. They enable complex parametric facades and non-uniform patterns.
The Divide Surface tool creates patterns on faces. Combined with adaptive components, this generates sophisticated panel systems.
These techniques support computational design approaches where geometric rules generate architectural form.
Dynamo Integration
Dynamo extends Revit with visual programming capabilities. Create scripts that automate repetitive tasks or generate complex geometry.
Common architectural applications include automated room documentation, parametric facade generation, and data-driven space planning.
Sound familiar? If manual processes feel repetitive, Dynamo likely offers automation potential.
Staying Current with Revit Updates
Autodesk releases new Revit versions annually. Each version introduces new features, performance improvements, and bug fixes.
Recent Revit releases continue the evolution toward cloud collaboration and generative design integration. Checking official Autodesk resources provides current information on version-specific capabilities.
Backward compatibility works one direction. Newer versions open older files, but older versions cannot open newer files without downgrading.
Subscription includes access to all versions. Maintain compatibility with project teams by coordinating which version everyone uses.
Conclusion
Mastering Revit for architecture requires understanding both the technical tools and the architectural thinking they support. The software enables design workflows that integrate modeling, documentation, and collaboration in ways traditional CAD cannot match.
Start with Autodesk’s official Quick Start Guide and work through fundamental workflows systematically. Focus on understanding view types, element behavior, and parametric relationships before diving into advanced techniques.
The Revit Fundamentals course provides structured learning for educators and self-directed learners. For career advancement, the Autodesk Certified Professional certification validates comprehensive skills in architectural workflows.
But here’s the reality—software proficiency develops through practice on real projects. Apply concepts immediately, make mistakes, and troubleshoot problems. That’s how architectural Revit skills actually develop.
Ready to start? Download Revit, access the official tutorials, and begin with a simple building model. The learning curve is steep initially, but the capabilities justify the investment for architectural practice.
Frequently Asked Questions
What are the system requirements for running Revit for architecture?
Revit requires a 64-bit Windows OS, multi-core CPU, at least 12 GB RAM (32+ GB recommended for larger models), and a DirectX 11 compatible GPU. Performance improves with SSD storage and a dedicated CAD-grade graphics card. Exact requirements vary by version.
How long does it take to learn Revit for architectural projects?
Basic competency often develops in 2-3 months with regular practice. Professional proficiency for complex projects typically takes 6-12 months of consistent work. Mastery can require extensive real project experience over time.
Can Revit exchange files with other architectural software?
Yes. Revit supports IFC for BIM interoperability, DWG for CAD workflows, and FBX for visualization tools. Native integration works best within Autodesk products, while IFC is commonly used for coordination with other BIM platforms.
What’s the difference between Revit and Revit LT for architecture?
Revit LT includes core modeling and documentation tools but lacks worksharing, advanced family editing, and API access. Full Revit supports team collaboration, customization, and integration with analysis tools, making it suitable for larger projects.
How does Revit handle renovation and existing building documentation?
Revit uses phases to manage existing, demolished, and new elements. Phase filters control visibility and graphics in different views, allowing clear documentation of renovation stages within a single model.
Is Revit suitable for small residential projects?
Yes, though it may feel heavy for very small jobs. Revit provides coordinated drawings, schedules, and 3D visualization, which can benefit residential design. Efficiency improves with templates and reusable content.
What support resources exist when troubleshooting Revit problems?
Support options include Autodesk documentation, official forums, training centers, and subscription-based technical support. Additional help is available through user communities, tutorials, and industry blogs.

Our Case Studies
We have handled 200+ BIM & VDC projects for commercial, industrial, and residential sectors.
Our work includes:
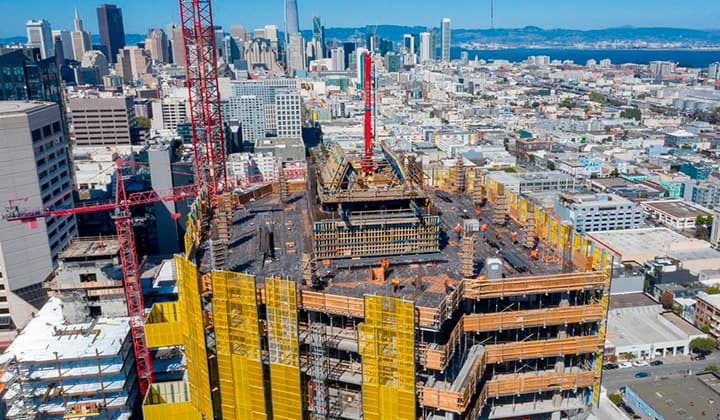
Formwork design automation
Our client from
California, USA
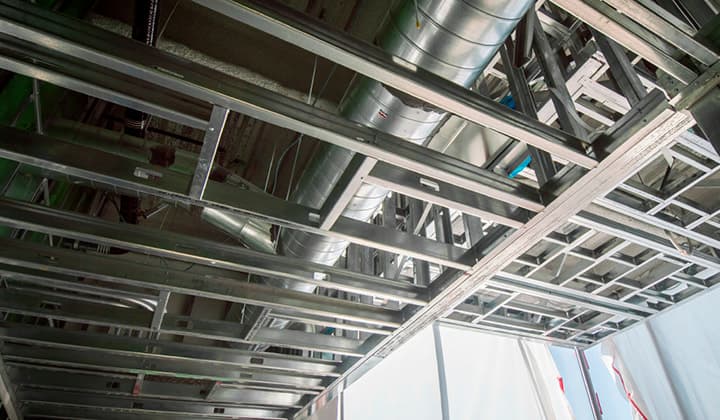
Suspended ceiling design automation
Our client from
New York, USA
Wall framing design automation
Our client from
California, USA