Have any questions? Contact us!
Join our team!
Request a free quote or consultation

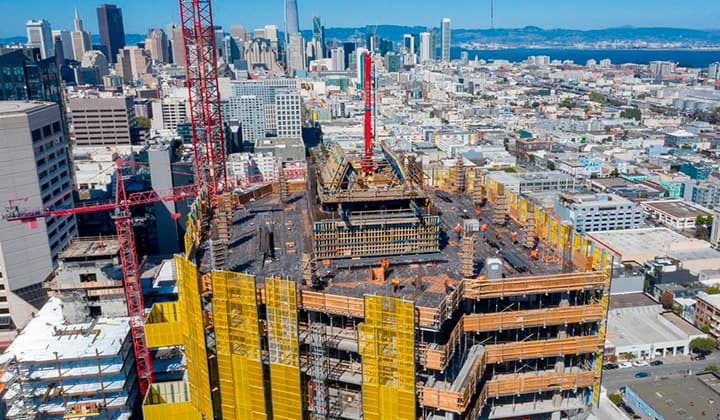
If you’ve ever stepped onto a bustling construction site, with cranes swinging and concrete mixers rumbling, you know it’s a world where every detail counts. As someone who’s spent years deciphering blueprints and working with construction crews, I can tell you that rebar shop drawings are the quiet heroes keeping it all together. These aren’t just technical sketches; they’re the precise instructions that ensure a building’s steel skeleton is strong enough to stand the test of time. Whether you’re an architect dreaming up designs, a contractor pouring concrete, or just curious about how buildings come to life, this guide will break down everything you need to know about rebar shop drawings. Grab a coffee, and let’s dive into why these drawings are the unsung stars of construction, how they’re made, and why they matter so much.
The Role of Rebar Shop Drawings in Construction
Imagine trying to bake a cake without a recipe – you might end up with a lumpy mess. That’s what building without rebar shop drawings is like. These detailed diagrams translate a structural engineer’s plans into actionable steps for placing reinforcing steel, or rebar, within concrete structures like beams, columns, slabs, and foundations. They’re not vague overviews; they’re hyper-specific guides that tell fabricators how to shape steel and workers where to place it, ensuring the structure can handle everything from daily loads to natural disasters.
Why are they so critical? For starters, they prevent chaos on-site. Without clear instructions, you might end up with rebar that’s too short, bent wrong, or misplaced, leading to costly rework or, worse, a weak building. I’ve seen projects grind to a halt because of mismatched steel, and trust me, it’s not fun explaining that to a client. These drawings also save money by reducing material waste and keep timelines tight by minimizing errors. Most importantly, they’re about safety – properly placed rebar ensures a building won’t crack under pressure or collapse during a storm. They’re the bridge between an engineer’s vision and a structure that lasts for decades.
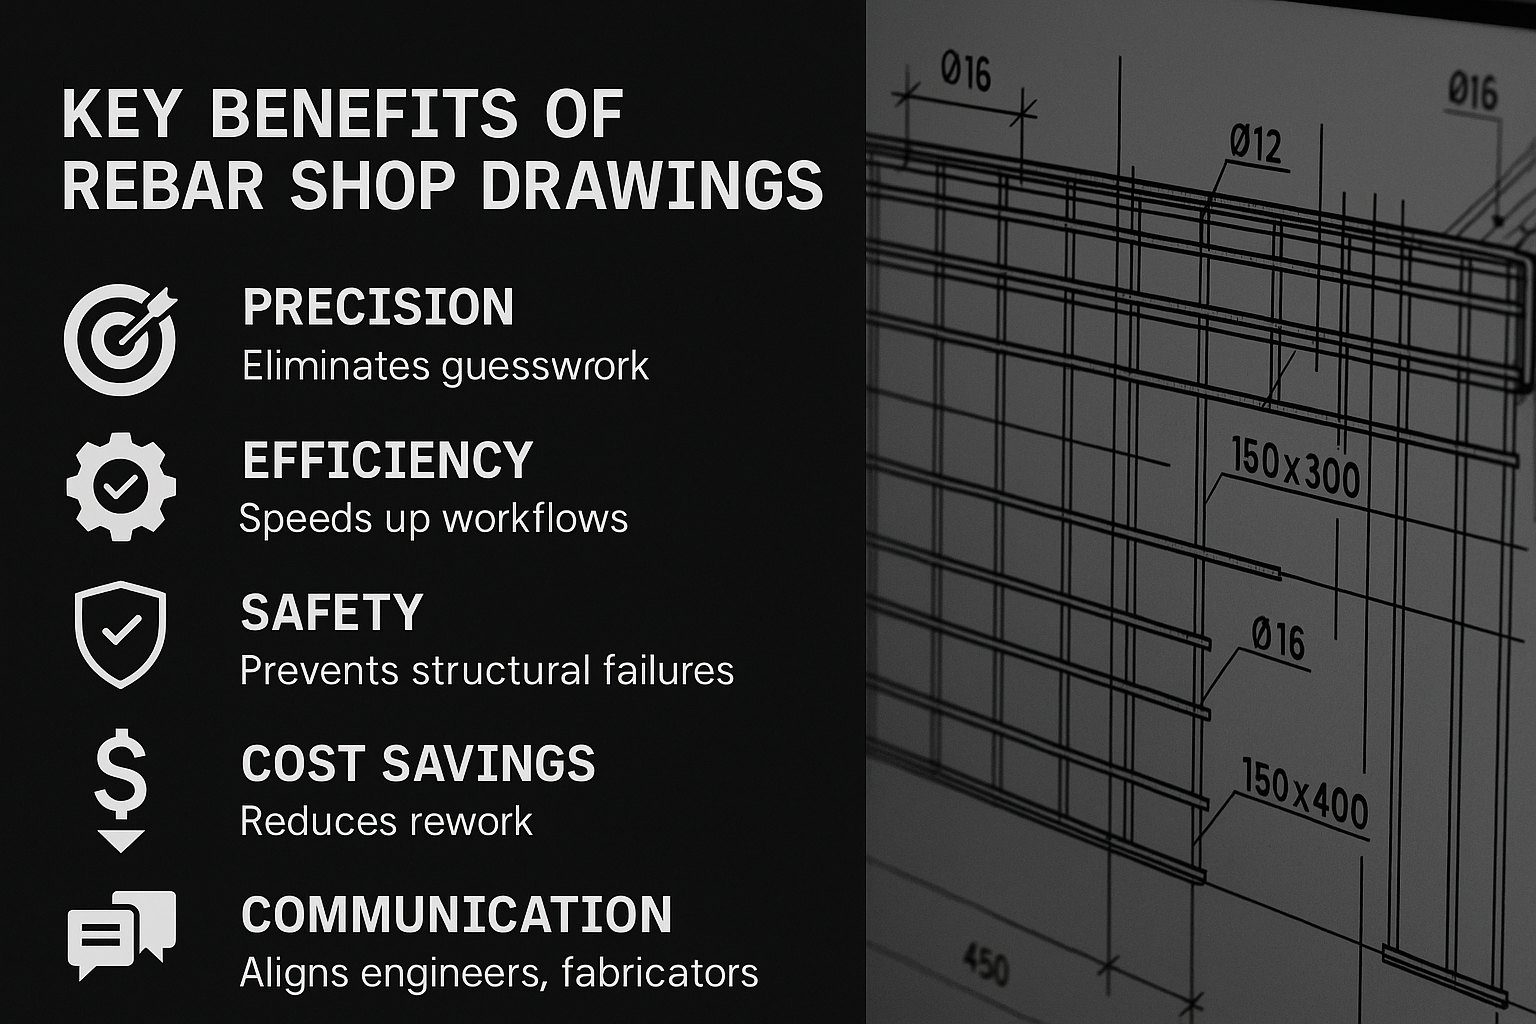
Key Benefits of Rebar Shop Drawings
- Precision: They eliminate guesswork, ensuring every bar is exactly where it needs to be.
- Efficiency: Clear instructions streamline fabrication and installation, speeding up workflows.
- Safety: Correct rebar placement prevents structural failures, protecting workers and occupants.
- Cost Savings: Fewer mistakes mean less rework and material waste, keeping budgets in check.
- Communication: They align engineers, fabricators, and crews, reducing misunderstandings.
Breaking Down the Components of Rebar Shop Drawings
Rebar shop drawings are packed with details, each serving a specific purpose to make the build smooth and sturdy. If you’ve ever looked at one, it might seem like a jumble of lines and codes, but every element has a job. Let’s unpack the main pieces that make these drawings tick, based on what I’ve seen working with detailers and engineers over the years.
Essential Elements of Rebar Shop Drawings
- Bar Labels: Every piece of rebar gets a unique identifier, like a name tag, to ensure it’s placed correctly. This prevents mix-ups during installation, especially on complex projects with thousands of bars.
- Bending Schedules: These are like choreography for steel, detailing how each bar should be shaped. They specify bend angles (e.g., 90 degrees), bend radii, and hook lengths to fit perfectly within the concrete form.
- Dimensions and Spacing: This part maps out exact bar lengths, diameters, and the gaps between them. Getting this right ensures the concrete distributes loads evenly, avoiding weak spots.
- Concrete Cover: This measures the distance between the rebar and the concrete’s outer surface, typically 1-3 inches, to protect steel from corrosion, fire, or environmental damage.
- Overlaps and Splicing: Rebar often needs to connect to form a continuous network. These details show where and how bars overlap or splice, maintaining structural strength across joints.
- Ties and Anchors: These instructions cover the ties, braces, or anchors that hold the rebar cage together before concrete is poured, ensuring stability during construction.
- Symbols and Notations: Think of these as shorthand for pros. Symbols indicate bar types (e.g., straight, stirrup), weld requirements, or special instructions, making complex info quick to read.
Each component is meticulously planned to avoid errors. I once saw a drawing miss a concrete cover spec, and the rebar corroded faster than expected – a costly lesson in why every detail matters.
Powerkh's Precision Rebar Shop Drawings: Building Stronger Futures
At Powerkh, we specialize in rebar shop drawing services as part of our structural detailing and BIM solutions. Since our establishment, we have been operating in the UK, USA, and Ukraine, collaborating with architects, engineers, and contractors to deliver accurate reinforcement detailing for construction projects.
We produce rebar shop drawings, bar bending schedules, and placement drawings to ensure precise reinforcement fabrication and installation. Using 3D modeling, we identify potential clashes, optimize material usage, and enhance coordination before construction begins.
Our rebar detailing services support commercial, industrial, and infrastructure projects. By integrating digital modeling with fabrication workflows, we aim to reduce errors, minimize rework, and improve overall project efficiency.
Key Highlights:
- Established in 2016 with operations in the UK, USA, and Ukraine
- Specializes in rebar shop drawings and structural detailing
- Uses 3D modeling for accurate reinforcement placement and clash detection
- Works with architects, engineers, and contractors for project coordination
- Supports commercial, industrial, and infrastructure projects

The Step-by-Step Process of Creating Rebar Shop Drawings
Crafting rebar shop drawings is like putting together a detailed instruction manual for a complex machine – it requires precision, foresight, and a lot of collaboration. Over the years, I’ve seen projects falter when this process is rushed, so let’s break it down into clear steps, with a closer look at what each involves to ensure the drawings are both accurate and practical.
Step 1: Collecting Essential Project Data
Before a single line is drawn, you need to gather all the pieces of the puzzle. This means pulling together the structural engineer’s plans, architectural designs, and any project-specific requirements. These could include load calculations, site conditions like soil type, or local building codes, especially in areas prone to earthquakes or high winds. I’ve found that this step is like prepping for a big exam – miss a key detail, like a seismic code requirement, and you’re setting yourself up for trouble later. Detailers often meet with engineers and architects at this stage to clarify ambiguities, ensuring the drawings align with the project’s goals. For example, a high-rise might need extra reinforcement in certain columns, and that’s got to be nailed down early.
Step 2: Drafting the Preliminary Rebar Layout
Once you’ve got the data, it’s time to sketch the initial layout. This is where you map out where each rebar piece will go within the structure’s elements, like beams, slabs, or foundations. Think of it as plotting a route for a road trip – you need to know the starting point, destination, and every turn in between. The layout visually represents straight bars, stirrups, and ties, showing their positions relative to the concrete forms. Detailers use software or manual drafting to create this blueprint, ensuring it reflects the engineer’s structural intent. I’ve seen layouts go wrong when assumptions are made about unclear specs, so constant communication with the engineer is key here to avoid costly revisions.
Step 3: Detailing Reinforcements for Specific Elements
Now comes the heavy lifting – detailing the reinforcements. This step zooms in on each structural component, specifying the exact size, shape, and placement of every rebar piece. For instance, a column might need vertical bars with specific diameters and horizontal stirrups at precise intervals. Bending details, like angles and hook lengths, are defined to ensure the bars fit perfectly within the concrete. This is where you also account for overlaps and splices to maintain a continuous reinforcement network. I remember a project where a detailer forgot to specify splice lengths for a slab, and we had to halt pouring to fix it. This step requires deep knowledge of structural standards and often involves referencing industry guidelines to ensure compliance.
Step 4: Annotating Dimensions, Quantities, and Specifications
With the reinforcements detailed, it’s time to add the fine print. This step involves annotating the drawings with precise measurements, bar counts, and special instructions. For example, you’ll note the exact length of each bar, the number of bars needed for a beam, and the spacing between them. You’ll also include details like concrete cover distances and weld notations. This is like writing clear directions for a recipe – if the measurements are off, the dish fails. These annotations make the drawings a practical guide for fabricators cutting and bending steel and for crews placing it on-site. Clarity here prevents misinterpretations that could lead to errors.
Step 5: Rigorous Review and Revision
Before the drawings are sent off, they go through a thorough review process. This is where you catch mistakes that could derail the project. Detailers and engineers check every detail – bar labels, dimensions, bending schedules, and compliance with codes. I’ve seen reviews uncover issues like incorrect concrete cover that would’ve exposed rebar to corrosion. Multiple rounds of checks are common, often using digital tools to flag inconsistencies. If changes are needed, revisions are made, and the drawings are rechecked. This step is critical because even a small error can lead to big problems, like rebar that doesn’t fit or compromises the structure’s strength.
Step 6: Finalizing and Sharing with Stakeholders
Once the drawings pass muster, they’re finalized and distributed to the project team. Fabricators use them to cut, bend, and shape rebar, while on-site crews rely on them to place the steel correctly within concrete forms. This step often involves converting the drawings into formats compatible with fabrication machines or sharing them via digital platforms for real-time access. Clear communication is vital here to ensure everyone understands the drawings. I’ve been on projects where last-minute clarifications saved us from misplacing critical reinforcements, proving that this final handoff is just as important as the earlier steps.
Key Considerations in the Creation Process
- Collaboration: Constant dialogue with engineers, architects, and fabricators ensures the drawings are practical and aligned with project goals.
- Compliance: Adhering to local building codes and industry standards is non-negotiable to avoid legal or safety issues.
- Precision: Every measurement and detail must be exact to prevent errors during fabrication or installation.
- Adaptability: Be ready to revise drawings if design changes arise, maintaining flexibility without sacrificing accuracy.
This detailed process, when done right, transforms a complex set of requirements into a clear, actionable plan that drives successful construction.
Leveraging Technology for Smarter Rebar Detailing
Gone are the days of hand-drawn rebar plans on drafting tables – technology has revolutionized this field, and it’s a game-changer. I’ve seen projects transform from chaotic to streamlined just by embracing the right tools. Let’s explore how modern tech makes rebar shop drawings more accurate and efficient.
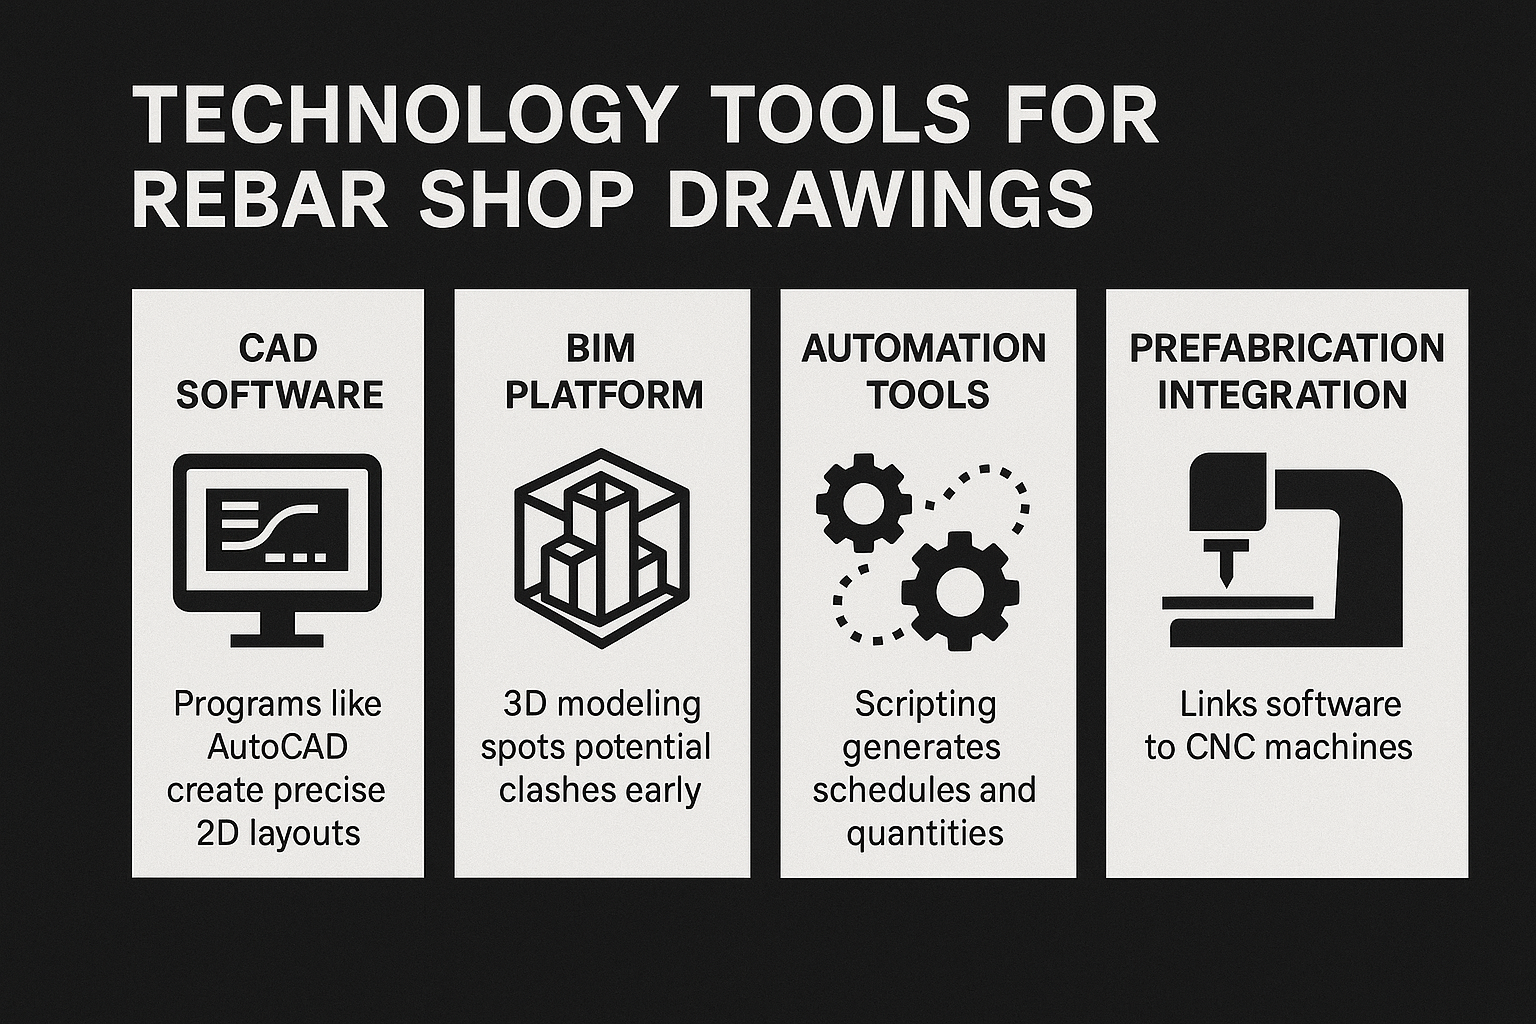
Technology Tools for Rebar Shop Drawings
- CAD Software: Programs like AutoCAD allow detailers to create precise 2D drawings, layer details, and make quick edits. They’re great for laying out complex rebar arrangements without manual errors.
- Building Information Modeling (BIM): BIM platforms like Revit or Tekla Structures take things to another level with 3D modeling. They create a digital twin of the project, letting you visualize rebar within the entire structure and spot potential clashes with pipes or ducts before construction starts.
- Automation Tools: Scripting tools, like those in Dynamo, automate repetitive tasks such as generating bending schedules or calculating quantities. This cuts hours off the detailing process and reduces human error.
- Prefabrication Integration: Modern software links directly to CNC machines, turning drawings into machine instructions for cutting and bending rebar. This ensures fabricated pieces match the drawings exactly.
Using BIM, for instance, I’ve seen teams catch a rebar clash with HVAC ducts early, avoiding a costly fix during construction. These tools don’t just make drawings prettier; they make projects faster, cheaper, and safer.
Ensuring Accuracy Through Quality Control and Collaboration
Accuracy in rebar shop drawings isn’t just a nice-to-have; it’s a must. A single wrong measurement can lead to a domino effect of issues, from wasted materials to compromised safety. I’ve learned from experience that a solid quality control process is your best defense against these headaches.
Quality Control Practices
- Multiple Reviews: Drawings should be checked at least twice – once by the detailer and again by an engineer or supervisor. Focus on dimensions, bar labels, and compliance with codes.
- Checklists: Use standardized checklists to catch common errors, like incorrect concrete cover or missing splice details.
- Digital Validation: BIM software can run automated checks for clashes or inconsistencies, flagging issues before they reach the site.
- Documentation: Track all revisions and changes to ensure transparency and avoid confusion during implementation.
Collaboration is just as crucial. Detailers, engineers, fabricators, and on-site crews need to stay in sync. Regular meetings, whether in-person or via digital platforms, help clarify ambiguities and address changes. I once worked on a project where a last-minute design tweak wasn’t communicated, and we had to redo a whole section of rebar. Clear, ongoing communication prevents those kinds of slip-ups
How Rebar Shop Drawings Fit Into Modern Construction
Today’s construction industry is all about speed, sustainability, and precision, and rebar shop drawings are evolving to keep up. With the rise of modular construction and prefabrication, these drawings are increasingly linked to automated systems that produce rebar off-site. This cuts down on-site labor and waste, aligning with eco-friendly building trends.
BIM is also pushing boundaries, allowing for real-time updates and collaboration across global teams. Imagine a detailer in one country tweaking a drawing while the site crew in another sees the changes instantly – that’s the future we’re heading toward. Plus, with stricter building codes and a focus on resilient structures, accurate rebar detailing is more critical than ever to meet seismic, wind, and environmental standards.
Wrapping Up: Why Rebar Shop Drawings Are Your Project’s Best Friend
At the end of the day, rebar shop drawings are more than just technical documents; they’re the glue that holds a construction project together. They ensure every piece of steel is exactly where it needs to be, keeping buildings safe, budgets intact, and timelines on track. From their detailed components to the tech-driven processes behind them, these drawings are a testament to the power of precision in construction. Whether you’re sketching plans or pouring concrete, understanding and valuing these drawings will make your projects stronger and your life easier. So, next time you’re on a site, give a nod to those unsung heroes – they’re working hard to make sure your building stands tall.
Frequently Asked Questions (FAQs)
How do rebar shop drawings differ from structural drawings?
Rebar shop drawings focus exclusively on the details of steel reinforcement, including bar sizes, bends, and placements. Structural drawings, on the other hand, provide a broader overview of the entire building, covering elements like beams, columns, and materials without diving into rebar specifics.
Are rebar shop drawings necessary for small-scale projects?
Yes, even small projects like home extensions or single-story buildings need rebar shop drawings to ensure proper reinforcement. They help maintain structural integrity, meet building codes, and prevent issues like cracking or settling over time.
How can I ensure my rebar shop drawings meet local building codes?
Work closely with structural engineers familiar with local regulations. Conduct thorough reviews of the drawings, cross-reference them with code requirements, and consult with inspectors or authorities to confirm compliance before fabrication begins.
What happens if there’s an error in a rebar shop drawing?
Errors can lead to misaligned rebar, weakened structures, or costly rework. In severe cases, they could cause safety hazards like cracks or collapses. Rigorous quality checks, collaboration, and revisions during the detailing process are essential to catch and fix issues early.
Our Case Studies
We have handled 200+ BIM & VDC projects for commercial, industrial, and residential sectors.
Our work includes:
Formwork design automation
Our client from
California, USA
Suspended ceiling design automation
Our client from
New York, USA
Wall framing design automation
Our client from
California, USA