Vous avez des questions ? Contactez nous !
Rejoignez notre équipe !
Demander un devis ou une consultation gratuite

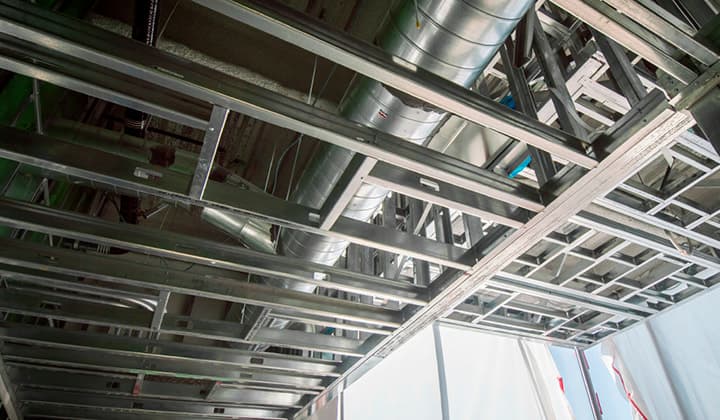
Backfill in construction refers to the material used to refill excavated areas around foundations, trenches, and other structures after the primary construction work is complete. This process involves carefully selecting appropriate materials, placing them in layers, and compacting them to provide structural support, prevent settlement, and ensure proper drainage around the built structure.
Ever watched a construction project and wondered what happens to all that dirt after workers dig the foundation? The answer isn’t as simple as “throw it back in the hole.”
Backfilling is one of those construction processes that rarely gets attention until something goes wrong. A cracked foundation wall. A sunken patio. Water pooling against your basement. These problems often trace back to improper backfilling.
Here’s the thing though—backfilling is both an art and a science. It requires understanding soil mechanics, drainage principles, and compaction techniques. Get it right, and your structure sits on a stable, well-drained foundation for decades. Get it wrong, and you’re looking at costly repairs down the line.
This guide breaks down everything about backfill in construction: what it is, why it matters, which materials work best, and how professionals ensure proper compaction. Whether you’re a contractor, homeowner, or just curious about construction processes, you’ll find practical insights here.
Understanding Backfill: More Than Just Filling Holes
Backfill is the material used to refill an excavation after the primary construction work—like laying a foundation or installing utilities—has been completed. But calling it “fill dirt” misses the point entirely.
The backfilling process serves multiple critical functions. It provides lateral support to foundation walls, preventing them from bowing or cracking under soil pressure. It establishes proper drainage pathways to direct water away from structures. And it creates a stable base for whatever comes next, whether that’s a driveway, landscaping, or additional construction.
Think of backfill as the supporting cast in a construction project. Foundations get all the glory, but without proper backfill support, even the best foundation can fail.
The material itself varies widely depending on the application. Sometimes excavated soil works perfectly fine. Other times, engineers specify imported materials with specific properties. The selection depends on structural requirements, drainage needs, and soil conditions.
When Backfilling Happens in Construction Projects
Timing matters in backfilling. Rush it, and you risk damaging fresh concrete or disrupting utility installations. Wait too long, and excavation walls might collapse or weather conditions could complicate the work.
For foundation work, backfilling typically occurs after the foundation walls have cured sufficiently to withstand lateral pressure. Concrete needs time to achieve adequate strength—usually at least seven days, though this varies based on mix design and weather conditions.
Utility trenches follow a different timeline. Once pipes are laid, inspected, and bedded properly, backfilling can proceed relatively quickly. The goal is to protect the utilities while restoring the surface for other uses.
Retaining walls require staged backfilling. Workers place and compact material in lifts (layers), allowing the structure to gradually bear the increasing lateral load. This prevents sudden stress that could compromise the wall.
Work With Powerkh on BIM and Construction Documentation

If your project needs stronger BIM support and more reliable construction documentation, Powerkh is a practical team to bring in. The company provides BIM and VDC services for construction teams, including BIM modeling, BIM coordination, scan to BIM, structural detailing, prefabrication support, and BIM automation. The goal is straightforward: better models, clearer drawings, and fewer gaps between design and construction.
Need Better Documentation Before Work Starts?
Talk with Powerkh to:
- build BIM models from project files or site data
- improve coordination and catch design conflicts earlier
- prepare shop drawings and fabrication-ready outputs
👉 Contact Powerkh to review your project and BIM needs.
Types of Backfill Materials: Choosing the Right Fill
Not all backfill materials are created equal. The right choice depends on drainage requirements, load-bearing needs, and what’s economically available in your area..
Soil and Clay-Based Backfill
Native soil excavated from the site often serves as backfill material. It’s economical—you’ve already paid to dig it up, so why not use it?
But soil quality varies dramatically. Sandy loam with minimal organic content works well. Heavy clay with poor drainage? Not so much. Clay expands when wet and shrinks when dry, creating pressure fluctuations against foundation walls.
The key is screening the material. Remove rocks larger than a few inches, roots, construction debris, and organic matter that will decompose and settle. What remains should be relatively uniform in composition.
Clay-based soils can work for backfill above the foundation drainage system, but they’re generally avoided in the critical zone immediately against foundation walls where drainage matters most.
Gravel and Crushed Stone
Gravel ranks as the premium backfill material for foundation work, particularly in the drainage zone adjacent to walls. Water moves freely through gravel, preventing hydrostatic pressure buildup that can crack foundations.
Crushed stone comes in various sizes, typically designated by numbers. #57 stone (about ¾ inch) is common for foundation drainage. Smaller sizes work for utility bedding. Larger stone provides excellent drainage but can be harder to compact around irregular shapes.
The downside? Cost. Gravel costs significantly more than using excavated soil, especially if it needs to be trucked in from a distance. Many projects use gravel strategically—against foundation walls and around drainage systems—while using soil for upper layers.
Sand as Backfill Material
Sand occupies the middle ground between soil and gravel. It drains reasonably well, compacts to a stable density, and costs less than stone.
Coarse sand works better than fine sand for most applications. Fine sand can act almost like a liquid when saturated, losing bearing capacity. Coarse sand maintains structure even when wet.
Utility companies often prefer sand for backfilling around pipes. It’s gentle on protective coatings, provides uniform support, and allows future excavation without damaging the utilities.
Controlled Low-Strength Material (CLSM)
CLSM, sometimes called flowable fill, is a cement-based slurry that flows like concrete but remains weak enough to excavate later if needed. It’s particularly useful in confined spaces where compaction equipment can’t operate effectively.
The material is self-leveling and self-compacting. Pour it in, let it cure, and you’ve got uniform support without the labor and equipment needed for traditional compaction.
CLSM costs more than conventional backfill materials, but it saves time and labor. For utility trenches in urban areas or tight spaces around structures, the trade-off often makes sense.
The Backfilling Process: Steps to Structural Stability
Proper backfilling follows a methodical sequence. Rushing through these steps is how settlement problems develop.
Pre-Backfill Preparation and Inspection
Before placing any backfill, inspect the excavation thoroughly. Check that foundation walls have cured adequately. Verify that waterproofing or dampproofing applications are complete and undamaged. Confirm that perimeter drains are installed and functioning.
According to OSHA safety regulations for excavation work, protective systems must remain in place during backfilling to prevent cave-ins. Workers should never be in unprotected trenches during fill placement.
Document the condition of structures before backfilling begins. Photograph foundation walls, utility connections, and drainage installations. If settlement or damage occurs later, this documentation proves invaluable.
Placement in Lifts: The Layer System
Backfill gets placed in lifts—horizontal layers of specified thickness. Typical lift thickness ranges from six to twelve inches before compaction, though this varies based on material type and compaction equipment.
Why lifts instead of dumping all the material at once? Compaction equipment can only effectively compress material to a certain depth. Thicker layers result in poorly compacted zones deep in the fill, where settlement problems hide until later.
Each lift gets spread evenly across the work area before compaction. Avoid piling material against one side of a foundation, which creates unbalanced lateral pressure.
Compaction Methods and Equipment
Compaction removes air voids from backfill material, increasing density and reducing future settlement. The required compaction level varies by application—structural backfill typically requires 90-95% of maximum density, while landscape areas might accept 85%.
Different equipment suits different situations. Plate compactors work well in confined spaces and for thin lifts. Jumping jack rammers excel in trenches. Vibratory rollers handle larger areas efficiently. Hand tampers suffice for very small areas but are labor-intensive.
Soil moisture content affects compaction effectiveness dramatically. Too dry, and particles won’t consolidate properly. Too wet, and excess water prevents adequate densification. Most soils compact best at near-optimal moisture content, which varies by soil type.
Testing confirms compaction quality. Field density tests using methods like the sand cone test (ASTM D1556) or nuclear density gauge measure in-place density. Test results get compared to laboratory maximum density values to calculate the percent compaction achieved.
Managing Moisture During Backfilling
Water content makes or breaks compaction efforts. Engineers specify optimal moisture ranges based on soil type and project requirements.
Dry material needs water added before compaction. This is often done by spraying lifts with water trucks or hoses, then allowing moisture to distribute through the material before compacting.
Wet material presents a tougher challenge. Sometimes it can be aerated by spreading and turning. Other times, waiting for natural evaporation is the only option. In persistent wet conditions, drier imported material might be necessary.
Special Considerations for Foundation Backfill
Foundation backfilling requires extra care. The first lift against the wall is critical—it sets the stage for everything above.
Many specifications call for hand-compacting or using small equipment for the initial few feet adjacent to the foundation. This prevents damage to waterproofing and ensures adequate support directly against the wall.
Balanced backfilling matters when dealing with basement walls or deep foundations. Fill both sides of a wall at roughly the same rate to avoid unbalanced pressure that could shift or crack the structure.
Critical Factors Affecting Backfill Performance
Several variables determine whether backfill performs as intended or causes problems years later.
Drainage and Water Management
Water is both friend and enemy in backfilling. Controlled moisture aids compaction. Uncontrolled water causes settlement, erosion, and hydrostatic pressure.
Proper backfill design includes drainage pathways. This typically means gravel against foundation walls, connected to perimeter drains that daylight to storm systems or sump pumps. The gravel layer acts as a drainage chimney, intercepting water before it reaches the foundation.
Surface grading directs water away from structures. The final grade should slope away from buildings—typically a minimum of 6 inches of fall over the first 10 feet. This simple measure prevents water from ponding against foundations and infiltrating backfill.
Soil Type and Classification
Soil mechanics govern backfill behavior. Different soil types have different engineering properties: bearing capacity, permeability, compressibility, and expansion potential.
Engineers classify soils using standardized systems. The Unified Soil Classification System (USCS) groups soils by grain size and plasticity. OSHA uses a simpler system for excavation safety: Type A (stable, cohesive), Type B (moderate stability), and Type C (unstable, granular or submerged).
Understanding soil type helps predict performance. Granular soils (sand, gravel) compact well and drain freely but provide less cohesion. Cohesive soils (clay, silt) hold together but drain poorly and may shrink or swell with moisture changes.
Load-Bearing Requirements
What’s going on top of the backfill? A garden bed has minimal load requirements. A driveway or building pad demands much higher compaction and bearing capacity.
Structural backfill—material supporting foundations, slabs, or pavements—requires higher compaction standards, typically 95% of maximum density. Non-structural areas might only require 85-90% compaction.
Heavy equipment operating on fresh backfill can actually aid compaction, but only if the fill is properly placed in lifts. Driving heavy machinery over thick, loose fills creates uneven compaction and potential settlement zones.
Environmental and Climate Factors
Weather affects backfilling operations significantly. Rain turns excavations into mud pits. Freezing temperatures prevent proper compaction and can freeze moisture in the fill, leading to problems when spring thaw arrives.
Frost depth considerations matter in cold climates. Backfill above frost-susceptible soils can heave during freeze-thaw cycles. Some regions require deeper foundations or special frost-protected shallow foundation systems to prevent frost heaving.
Groundwater levels influence material selection and drainage design. High water tables require more extensive drainage systems and may limit backfill material options.
Common Backfilling Methods and Techniques
Different projects call for different backfilling approaches. The method chosen depends on site conditions, access, and project scale.
Hand Backfilling
Hand backfilling uses manual labor with shovels and hand tampers. It’s slow and labor-intensive, but necessary in tight spaces where equipment can’t reach.
This method works for small areas around utilities, near structures where equipment might cause damage, or in confined spaces. Workers place material carefully, tamping each layer to achieve adequate density.
Hand compaction rarely achieves the density possible with mechanical equipment. Where high compaction is critical, hand backfilling might be limited to areas immediately adjacent to structures, with mechanical backfilling handling the remainder.
Mechanical Backfilling
Mechanical methods use equipment to place and compact fill material. This is the standard approach for most projects of any size.
Excavators or loaders place material in the excavation. Compaction equipment then consolidates each lift. The specific equipment varies: walk-behind plate compactors for smaller areas, ride-on rollers for larger sites, jumping jacks for trench work.
Mechanical backfilling is faster and achieves better compaction than hand methods. But it requires space for equipment to operate and can damage structures or utilities if not done carefully.
Flowable Fill (CLSM) Method
Flowable fill eliminates traditional compaction entirely. The cement-based slurry gets pumped or poured into the excavation, where it self-levels and hardens.
This method shines in difficult conditions: narrow trenches, areas with limited access, locations with high groundwater, or situations requiring immediate support. Utility companies use it extensively for permanent street repairs.
The material remains excavatable—it’s designed to be weak enough to dig through later if utilities need service. Yet it provides immediate, uniform support without settlement concerns.
Flooding Method
Flooding or jetting involves placing granular material in the excavation, then flooding it with water to settle and consolidate the fill. This method is generally not recommended for structural applications.
Water causes material to settle naturally, but the resulting density is unpredictable and usually insufficient for structural loads. The method might be acceptable for some non-critical fills, but most modern projects specify controlled mechanical compaction instead.
Equipment Used in Backfilling Operations
The right equipment makes backfilling efficient and effective. Wrong choices lead to poor results and wasted effort.
| Equipment Type | Best Applications | Typical Compaction Depth | Avantages
|
|---|---|---|---|
| Plate Compactor | Confined spaces, thin lifts, granular soils | 6-8 inches | Maneuverable, effective on granular material |
| Jumping Jack Rammer | Trenches, cohesive soils, tight areas | 8-12 inches | Works well on clay and mixed soils |
| Vibratory Roller | Large areas, granular fills, roads | 12-18 inches | Efficient for large-scale work |
| Sheepsfoot Roller | Cohesive soils, clay fills | 6-9 inches | Penetrates and kneads clay effectively |
| Hand Tamper | Very small areas, touch-up work | 4-6 inches | No power required, precise control |
Excavators and Loaders
These machines place backfill material but don’t compact it. Excavators with buckets scoop material from stockpiles and deposit it in excavations. Loaders move larger volumes more quickly on sites with good access.
Operators should place material in even layers, not dump it in piles. Spreading material uniformly before compaction ensures consistent results.
Compaction Equipment Selection
Choosing compaction equipment depends on soil type, lift thickness, and space constraints.
Plate compactors excel with granular materials—sand and gravel. They’re relatively lightweight and maneuverable. Walk-behind models handle most residential work. Larger ride-on plates tackle commercial projects.
Jumping jack rammers work better with cohesive soils that plate compactors struggle to consolidate. The impact action of rammers kneads and compresses clay-based soils effectively. They’re also narrower, making them ideal for trench work.
Rollers come in many configurations. Smooth drum rollers work on granular soils. Padfoot or sheepsfoot rollers have projections that penetrate and compact cohesive soils. Pneumatic tire rollers provide good compaction on a variety of materials.
Testing and Monitoring Equipment
Verifying compaction requires testing equipment. Several methods exist, each with trade-offs.
Nuclear density gauges are highly accurate for field density testing, providing results within 1-2% of actual density when properly calibrated.
Sand cone density tests (ASTM D1556) offer an alternative. A hole is excavated in the compacted fill, and the volume is measured by filling it with calibrated sand. The excavated material is weighed and its moisture content determined. Calculations yield in-place density. This method is accurate but slower than nuclear testing.
Dynamic cone penetrometers measure soil compaction at shallow depths by driving a cone into the fill and counting blows per inch of penetration. The number of drops required to drive the cone a distance of 83 mm [3.25 in.] or 3.25 in. (83 mm) is used as a criterion for compaction assessment. Penetration resistance correlates to soil density, providing a quick field assessment.
Safety Considerations in Backfilling
Backfilling poses real hazards. OSHA regulations address excavation safety specifically to prevent the numerous injuries and fatalities that occur in trench and excavation work.
OSHA Excavation Standards
OSHA Standard 1926.651 and 1926.652 govern excavation and protective systems in construction. Key requirements include:
Competent person inspections before work begins each shift and after any event that could affect stability. This person must be trained to identify hazards and authorized to take corrective action.
Protective systems required for excavations deeper than 5 feet, except in stable rock. These include sloping, benching, shoring, or shielding systems designed to prevent cave-ins.
Excavated material (spoil) must be kept at least 2 feet from excavation edges to prevent surcharge loads that could trigger collapse.
Safe access and egress—ladders or ramps within 25 feet of workers in excavations 4 feet or deeper.
Equipment Operation Safety
Heavy equipment operating near excavations creates hazards. Equipment can destabilize excavation walls, strike workers, or roll into the excavation.
Operators need clear communication with ground workers. Spotters help when visibility is limited. Barricades or warning systems prevent unauthorized personnel from entering work zones.
Compaction equipment, while smaller than excavators, still poses risks. Vibrating plates can cause hand-arm vibration syndrome with prolonged use. Jumping jacks can kick back unexpectedly. Proper training and use of PPE (personal protective equipment) mitigates these risks.
Utility Location and Protection
Underground utilities present serious hazards during backfilling. Striking a gas line, electrical conduit, or water main can cause injuries, service disruption, and expensive repairs.
Call-before-you-dig services (811 in the United States) mark public utility locations. But private utilities—lines between the meter and structure—might not appear in public records. Site surveys and careful excavation prevent utility strikes.
During backfilling around utilities, hand methods or small equipment prevent damage. Operators should verify utility locations before each lift and backfill carefully around exposed lines.
Environmental and Atmospheric Hazards
Excavations can contain hazardous atmospheres—oxygen deficiency, toxic gases, or explosive concentrations of methane or other vapors. OSHA requires testing when excavations exceed 4 feet in depth in areas where hazardous atmospheres could exist.
Testing equipment measures oxygen levels (must be 19.5-23.5%), combustible gas concentrations (must be below 10% of lower explosive limit), and toxic gases. If hazardous conditions exist, the atmosphere must be controlled through ventilation or other means before workers enter.
Soil contamination presents another concern. Fill material should be tested if there’s any possibility of contamination from previous site uses. Contaminated soil requires special handling and disposal—it cannot simply be used as backfill.
Quality Control and Testing in Backfill Projects
Testing ensures backfill meets specifications. Without verification, there’s no way to know if compaction efforts achieved the required density.
Compaction Testing Standards
Industry standards define testing procedures. ASTM standards provide the framework most commonly referenced in specifications.
Laboratory tests establish maximum density values for specific soil types. The Modified Proctor test (ASTM D1557) or Standard Proctor test (ASTM D698) determine the maximum dry density achievable for a soil at optimal moisture content. Field compaction targets are expressed as percentages of this maximum—typically 90-95% for structural fills.
Field density testing compares in-place density to the laboratory maximum. The sand cone method (ASTM D1556) requires mass measurements accurate to 0.01 pounds or 5 grams, with water content reported to the nearest 1% and density to three significant digits.
Frequency of Testing
How often should testing occur? Specifications vary, but common requirements include:
One test per lift per 500-1,000 square feet of area. More frequent testing in critical areas like directly behind retaining walls. Additional tests if material type changes or if visual inspection suggests problems.
Random test locations prevent operators from selectively compacting only where they expect testing. But tests should also target areas that appear questionable during visual inspection.
Corrective Actions for Failed Tests
What happens when testing reveals inadequate compaction? The typical remedy involves re-working the failed area.
If material is too dry, add water and re-compact. If too wet, aerate by scarifying and turning the material, allow drying, then re-compact. If moisture is adequate but density is low, additional compaction passes may achieve the required density.
Sometimes the issue is lift thickness—the layer is too thick for the equipment to compact effectively. In this case, remove material to achieve proper lift thickness, then compact again.
Documentation matters. Record all test results, both passes and failures. Document corrective actions and re-testing. This creates a quality assurance trail that demonstrates due diligence.
Cost Factors in Backfilling Projects
Backfilling costs vary widely based on project specifics. Understanding cost drivers helps with budgeting and decision-making.
Material Costs
Material represents a significant cost component. Native soil costs nothing for the material itself—you’re just using what was excavated. But it might require screening to remove unsuitable material.
Imported materials add substantial cost. Sand costs more than using native soil. Gravel costs more than sand. CLSM costs considerably more than conventional materials, though it saves labor and equipment time.
Transportation adds to material costs. A gravel pit 5 miles away is much cheaper than one 50 miles away when factoring in trucking. Some projects specify “locally available” materials partly to control costs.
Labor and Equipment Costs
Equipment rental rates vary by machine type and local market conditions. Smaller compactors might rent for modest daily rates, while larger specialized equipment costs significantly more.
Labor costs include equipment operators and laborers placing and spreading material. Hand backfilling is labor-intensive and therefore expensive on larger projects. Mechanical methods reduce labor costs but increase equipment costs.
Efficiency matters. Experienced crews with proper equipment complete backfilling faster, reducing overall costs. Delays due to weather, inadequate compaction requiring rework, or poor planning inflate costs.
Testing and Inspection Costs
Quality control adds cost but prevents expensive problems later. Testing services typically charge per test, with costs varying based on test method and laboratory requirements.
Some projects require third-party inspection and testing—an independent firm verifies that work meets specifications. This adds cost but provides assurance to owners and reduces liability for contractors.
Hidden Costs and Contingencies
Unforeseen conditions drive up costs. Groundwater requiring dewatering. Contaminated soil requiring special disposal. Weather delays. Utility conflicts discovered during work.
Wise budgets include contingencies—typically 10-20% for backfilling work—to cover unexpected conditions. Projects without adequate contingencies often face difficult choices when problems arise.
Common Problems and Solutions in Backfilling
Even well-planned backfilling operations encounter challenges. Recognizing common problems and knowing solutions helps keep projects on track.
Settlement After Backfilling
Settlement—the gradual sinking of backfill—creates serious problems. Sunken areas collect water. Pavements crack. Structures can be damaged if settlement is differential (uneven).
Inadequate compaction is the usual culprit. Thick lifts, wet material, or insufficient compaction effort leave voids that collapse under load or as material consolidates over time.
The solution? Proper compaction during placement. Test to verify. If settlement occurs after completion, the affected area must be excavated and re-compacted properly.
Water Accumulation and Drainage Issues
Water pooling against foundations or in backfilled areas indicates drainage problems. Poor surface grading, inadequate subsurface drainage, or impermeable backfill material can cause water accumulation.
Correcting drainage problems might require re-grading surfaces to establish proper slope. Installing or repairing perimeter drains. Adding a gravel drainage layer against foundations. Sometimes waterproofing or drainage board installation on foundation walls is necessary.
Foundation Wall Damage
Foundation walls can crack or bow due to backfilling-related issues. Unbalanced backfilling—filling one side much higher than the other before the wall is adequately braced—creates unequal pressure that can shift or crack walls.
Backfilling before concrete reaches adequate strength is another cause. Walls need time to cure before handling lateral pressure from backfill.
Using heavy equipment too close to walls can also cause damage. Impacts from equipment or excessive vibration from compactors operated directly against walls can crack concrete or damage waterproofing.
Prevention requires following proper procedures: balanced filling, adequate cure time, appropriate equipment selection, and careful operation near structures.
Contamination and Environmental Concerns
Backfill material contaminated with oil, chemicals, or other pollutants creates environmental and health hazards. Such material cannot be used as fill without treatment or proper permits.
Testing suspect material before use prevents environmental violations. If contamination is discovered during excavation, work typically stops while environmental professionals assess the situation and develop remediation plans.
Proper material sourcing and documentation protects against contamination issues. Know where fill material comes from and verify it’s clean.
Best Practices for Successful Backfilling
Certain practices consistently produce good backfilling results. Following these guidelines reduces problems and improves outcomes.
Planning and Specification Development
Good backfilling starts before excavation begins. Develop clear specifications addressing material requirements, compaction standards, testing frequency, and acceptance criteria.
Consider site-specific factors: soil conditions, groundwater levels, structural loads, climate. Specifications should reflect actual project needs, not generic boilerplate that might not apply.
Identify material sources in advance. Will excavated soil work, or is imported material needed? Where will it come from? What’s the lead time for delivery?
Proper Material Selection and Preparation
Choose materials appropriate for the application. Structural areas need quality fill. Non-structural areas can accept lesser material.
Screen excavated soil to remove unsuitable components—organics, debris, oversized rocks. Stockpile different material types separately so they’re not mixed.
Test material before use if there’s any question about suitability. Laboratory classification and compaction testing establish baseline properties and maximum density values.
Controlled Placement and Compaction
Place material in specified lift thicknesses. Spreading material evenly across the area prevents uneven compaction.
Compact each lift thoroughly before placing the next. Don’t skip lifts or compress multiple lifts together—equipment can’t compact beyond a certain depth.
Maintain proper moisture content. Add water to dry material. Allow wet material to dry or aerate it. Compacting at optimal moisture produces maximum density with minimum effort.
Testing, Documentation, and Verification
Test regularly according to specification requirements. Don’t wait until the entire backfill is complete—test each lift or area as work progresses.
Document everything: material sources, placement dates, compaction equipment used, test results, weather conditions, and any issues encountered. Good documentation protects against liability and provides a record if problems arise later.
Visual inspection complements testing. Experienced inspectors can spot problems—material segregation, standing water, equipment issues—that might not show up in occasional density tests.
Emerging Technologies in Backfilling
Construction technology evolves constantly. Several innovations are changing how backfilling is done and monitored.
Drone Technology and Aerial Monitoring
Drones equipped with cameras and sensors provide new perspectives on backfilling operations. Aerial imagery documents progress, identifies problem areas, and creates visual records of work.
Photogrammetry—creating 3D models from drone photos—allows volumetric calculations of material placed. This helps verify that the correct amount of backfill was installed and enables tracking of progress over time.
Real-time data from drone surveys facilitates decision-making. Construction managers can see backfill progress, identify areas needing attention, and allocate resources more effectively.
Intelligent Compaction Systems
Modern compaction equipment increasingly includes sensors and GPS that monitor compaction in real time. These intelligent compaction (IC) systems measure factors like vibration frequency, amplitude, and machine speed to calculate compaction achieved.
GPS tracking creates maps showing exactly where equipment operated and how many passes were made at each location. This ensures complete coverage and identifies areas that might need additional compaction.
Some systems provide immediate feedback to operators, alerting them to areas of inadequate compaction before moving to the next lift. This real-time quality control catches problems early when they’re easier to fix.
Advanced Materials and Additives
Material science brings new options for backfill applications. Soil stabilization additives—cement, lime, or proprietary chemicals—improve poor soils, making them suitable for structural backfill.
Geosynthetics (geogrids, geotextiles) reinforce backfill and improve performance. Geogrids provide tensile reinforcement in fills, allowing steeper slopes or reduced wall thickness in retaining structures. Geotextiles separate different soil layers, preventing mixing while allowing drainage.
Lightweight fill materials—expanded polystyrene blocks, cellular concrete, or tire-derived aggregate—reduce loads on structures or underlying soils. These specialized materials cost more but solve problems conventional backfill can’t address.
Conclusion: Building on Solid Ground
Backfilling might seem straightforward—just fill the hole, right? But as this guide shows, proper backfilling involves careful material selection, methodical placement, thorough compaction, and rigorous testing.
The consequences of poor backfilling don’t appear immediately. Settlement develops gradually. Drainage problems worsen over time. Foundation damage might not become apparent for years. By then, repairs cost exponentially more than doing the job right initially.
Good backfilling practices protect investments. They ensure structures sit on stable, well-drained foundations. They prevent costly callbacks and warranty claims. And they demonstrate professionalism that builds reputation.
Whether you’re a contractor executing the work, an engineer designing the specifications, or a property owner overseeing construction, understanding backfilling fundamentals helps ensure quality results. The principles covered here—proper materials, controlled placement, adequate compaction, and verification testing—form the foundation of successful backfilling.
Technology continues advancing with intelligent compaction systems, drone monitoring, and innovative materials. But the core principles remain constant: select appropriate materials, compact them properly in lifts, and verify results through testing.
So the next time you see a construction crew backfilling an excavation, you’ll know there’s more happening than simply pushing dirt into a hole. You’re watching professionals create the stable, drained foundation that everything above depends on.
Ready to start your construction project? Apply these backfilling best practices to ensure your foundation stands the test of time. Consult with qualified geotechnical engineers and experienced contractors who understand the critical importance of proper backfilling. The investment in quality backfill work pays dividends in structural longevity and problem-free performance.
Frequently Asked Questions About Backfill in Construction
What is the difference between fill and backfill?
Fill refers to any material used to raise the grade or build up an area, often in locations that weren’t previously excavated. Backfill specifically describes material placed back into an excavation after construction work like foundation installation or utility placement is complete. All backfill is fill, but not all fill is backfill—the term backfill implies filling an area that was previously dug out.
How long should you wait before backfilling a foundation?
Concrete foundation walls typically need at least seven days to cure before backfilling, though this varies based on concrete mix design, weather conditions, and wall height. Cold weather extends curing time, while warm conditions may allow earlier backfilling. Some engineers require 14 to 28 days for tall walls or heavy backfill loads. The key is ensuring concrete reaches sufficient strength to resist lateral pressure from the backfill without cracking or shifting.
Can you use excavated soil as backfill material?
Excavated soil can often be used as backfill, but it depends on soil type and application. The material should be screened to remove rocks larger than a few inches, roots, construction debris, and organic matter. Clay-heavy soils with poor drainage work better for upper backfill layers rather than directly against foundation walls where drainage is critical. Sandy loam with minimal organics makes excellent backfill. If excavated soil is unsuitable, imported material meeting project specifications must be used instead.
What compaction percentage is required for backfill?
Structural backfill—material supporting foundations, slabs, or pavements—typically requires 90-95% of maximum dry density as determined by laboratory Proctor tests. Non-structural areas like landscape beds might only require 85-90% compaction. Utility trench backfill standards vary by jurisdiction and application, commonly ranging from 90-95%. The specific requirement should be stated in project specifications and is based on the intended use and loading of the backfilled area.
Why is proper backfill compaction important?
Proper compaction prevents settlement that causes sunken areas, cracked pavements, and foundation damage. Well-compacted backfill provides stable support for structures and surfaces above it. Adequate compaction also improves drainage characteristics and prevents water from pooling in voids within the fill. Poor compaction leaves air spaces that eventually collapse under load or infiltrating water, creating depressions and potentially damaging structures. The cost of proper initial compaction is far less than repairing settlement damage later.
What equipment is best for compacting backfill?
Equipment selection depends on soil type, area size, and access. Plate compactors work well for granular soils (sand, gravel) in confined spaces and small areas. Jumping jack rammers excel with cohesive soils (clay) and trench work. Vibratory rollers handle large open areas efficiently. Sheepsfoot rollers are best for clay-based fills. Hand tampers suffice for very small touch-up areas. The right choice considers the specific soil being compacted, the space available for equipment operation, and the compaction depth required per lift.
How do you prevent water problems in backfilled areas?
Preventing water issues requires multiple measures. Install perimeter drains at foundation footings to collect subsurface water. Use gravel backfill against foundation walls to create a drainage path to the perimeter drains. Grade surfaces to slope away from structures—minimum 6 inches of fall over 10 feet. Compact backfill properly to prevent settlement that creates low spots where water pools. Consider installing drainage boards or waterproofing on foundation walls in high-water-table situations. The goal is directing water away from structures through both surface grading and subsurface drainage systems.

Vous avez un projet BIM ? Parlez-en avec nous.
Nous contacterNos études de cas
Nous avons géré plus de 200 projets BIM et VDC pour les secteurs commerciaux, industriels et résidentiels.
Notre travail comprend
Automatisation de la conception des coffrages
Our client from
California, USA
Automatisation de la conception des plafonds suspendus
Our client from
New York, USA
Automatisation de la conception de l'ossature des murs
Our client from
California, USA