Haben Sie noch Fragen? Kontaktieren Sie uns!
Kommen Sie in unser Team!
Kostenloses Angebot oder Beratung anfordern

Clearing a construction site involves removing vegetation, debris, structures, and obstacles to prepare land for building. The process includes site surveys, securing permits, disconnecting utilities, grading the land, and ensuring OSHA compliance. Professional clearing typically takes 1-5 days depending on site size and complexity.
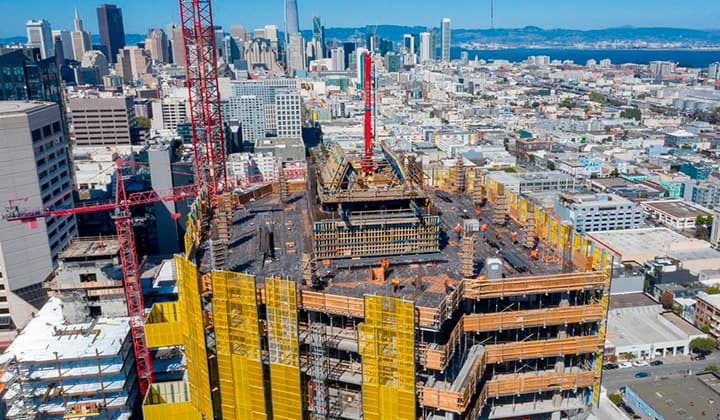
Before the first foundation gets poured or the first wall goes up, there’s work that needs doing. Unglamorous work. The kind that doesn’t make it into architectural renders but absolutely determines whether a project starts on solid ground or becomes a logistical nightmare three months in.
Site clearing is that work. It’s the process of transforming raw land into a clean, level, safe space where construction can actually happen. And while it might look straightforward—cut down some trees, haul away debris, level the ground—the reality involves permits, safety protocols, environmental compliance, and equipment that costs more per hour than most people make in a day.
Here’s how to do it right.
What Site Clearing Actually Involves
Site clearing is the systematic removal of vegetation, structures, debris, and obstacles from a construction area. It’s not just about making space. It’s about creating a foundation-ready surface that meets engineering specifications and regulatory requirements.
The process typically includes tree and vegetation removal, demolition of existing structures, debris hauling, grading and leveling, and erosion control setup. According to OSHA regulations under 29 CFR 1926.252, disposal of waste materials during construction must follow specific protocols, particularly when materials are dropped more than 20 feet outside building exteriors.
Site clearing matters because construction can’t proceed without it. Foundation crews need stable, level ground. Heavy equipment needs access routes. Utility connections need clear pathways. Skip proper clearing, and every subsequent phase gets delayed, complicated, or dangerously unstable.
Bring in Powerkh for Clearer Construction Documentation

Before work begins, construction teams usually need more than basic drawings. They need models, documentation, and coordination that hold up once the project gets moving. Powerkh provides BIM and VDC services such as BIM modeling, scan to BIM, BIM coordination, structural detailing, prefabrication support, and automation. The result is project documentation that is easier to work from.
Need Better Drawings and Documentation?
Talk with Powerkh to:
- convert design files or scans into usable BIM models
- support planning with more accurate documentation
- prepare detailed drawings for construction and fabrication
👉 Contact Powerkh to review your project and BIM needs.
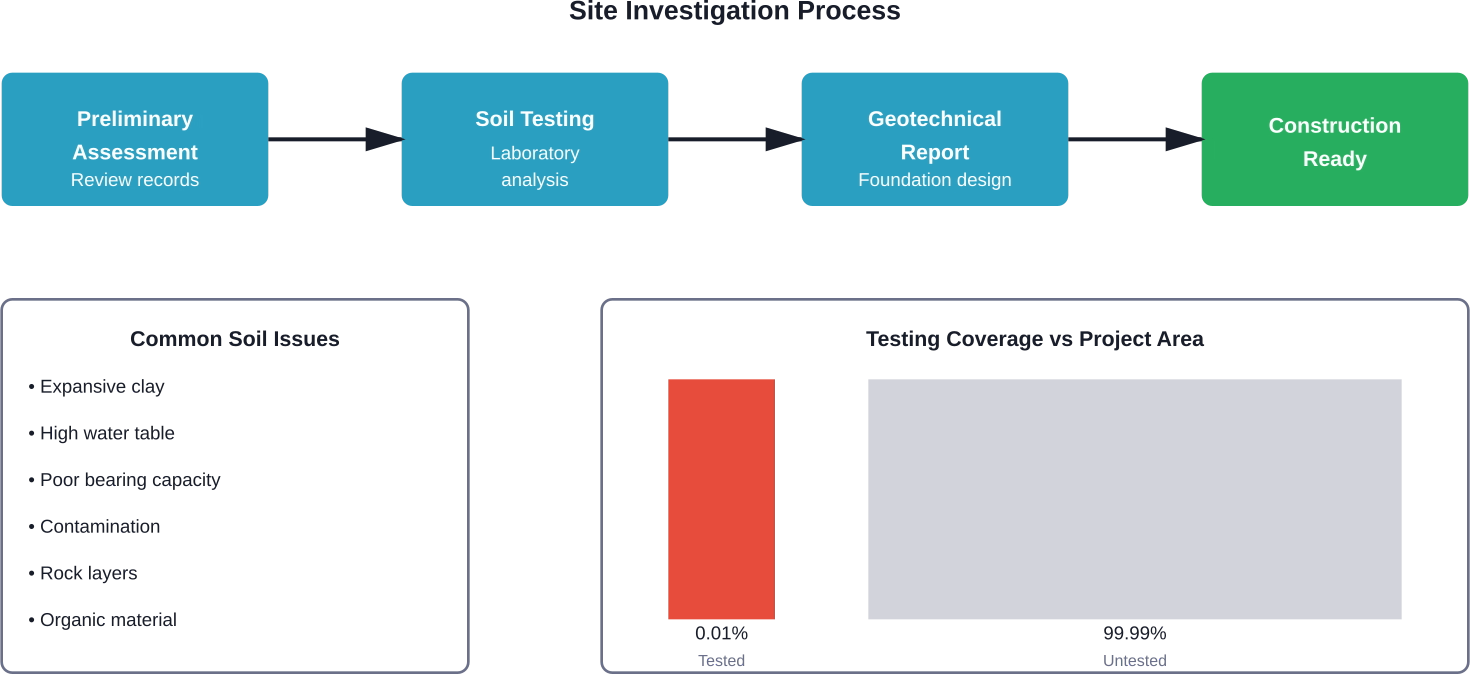
Step 1: Conduct a Thorough Site Survey and Assessment
Every clearing job starts with understanding what’s actually there. Walk the property. Document what exists. Identify what needs removing and what stays.
Look for existing structures, tree locations and species, underground utility markers, drainage patterns, soil conditions, slopes and elevation changes, and property boundaries. This isn’t just due diligence—it’s how contractors avoid cutting into gas lines, felling trees onto neighboring properties, or discovering halfway through that the site sits on protected wetlands.
Professional surveys typically include topographic mapping, soil testing, environmental assessments, and utility location services. These cost money upfront but prevent expensive mistakes later.
Permits and Regulatory Compliance
Most jurisdictions require permits before clearing begins. Requirements vary by location, but common permits include land disturbance permits, tree removal permits in protected areas, environmental impact clearances, and demolition permits for existing structures.
The EPA’s guidance on sustainable management of construction and demolition materials emphasizes proper handling of C&D waste, which depending on the material may include aggregate, compost and mulch, or manufactured products. Skipping permits doesn’t just risk fines—it can halt entire projects indefinitely.
Step 2: Secure the Site and Establish Clear Boundaries
Before equipment rolls in, the site needs perimeter control. This means fencing, signage, and restricted access points that keep unauthorized people out and liability risks down.
Install temporary fencing around the work area. Post clear signage indicating construction zones, restricted access, and safety requirements. Mark trees or features that must be preserved. Establish entry and exit points for equipment and material hauling.
OSHA standards under 29 CFR 1926 require construction sites to maintain proper safety protocols, including site access controls. This isn’t optional—it’s federal law.
Step 3: Disconnect Utilities and Handle Existing Structures
Nothing ruins a clearing project faster than hitting an active gas line or electrical conduit. Before demolition or heavy excavation begins, all utilities must be identified, marked, and disconnected.
Contact utility companies to mark underground lines. This service is often free through local call-before-you-dig services. Arrange disconnection of active utilities including electrical, gas, water, sewer, telecommunications, and cable services.
If existing structures need removal, demolition must follow proper protocols. This includes asbestos inspection for older buildings, systematic deconstruction rather than indiscriminate demolition, proper waste sorting and disposal, and salvage of reusable materials where feasible.
The EPA’s guidance on construction and demolition materials emphasizes sustainable management practices, including diversion of C&D materials from landfills through recycling and reuse programs.
Step 4: Remove Vegetation, Trees, and Organic Material
Vegetation removal goes beyond just cutting down whatever’s in the way. It requires planning to preserve valuable trees, prevent erosion, and handle organic waste properly.
Start with understory vegetation—brush, shrubs, and small plants. Then move to trees, which require specific equipment and techniques based on size and location. Stump removal or grinding prevents future settling and root decay issues. Root removal in critical foundation areas ensures stable ground.
Equipment for vegetation clearing typically includes brush cutters and mulchers, chainsaws and tree-cutting equipment, stump grinders, excavators for large root systems, and chippers for processing organic waste.
Oregon State University’s guidance on protecting trees during construction emphasizes the importance of proper tree protection zones. When trees must be preserved, establish critical root zones and avoid grade changes within drip lines.
Handling Debris and Waste Materials
What happens to all that vegetation and debris matters—legally and environmentally. OSHA requirements under 29 CFR 1926.252 specify that materials dropped more than 20 feet outside building exteriors must use enclosed chutes.
Organic materials can often be chipped and mulched on-site or hauled for composting. Construction debris requires sorting for recycling or proper disposal. Hazardous materials need specialized handling and documentation.
Step 5: Grade and Level the Site
Once vegetation and obstacles are cleared, the real foundation work begins. Grading transforms uneven terrain into a level, stable surface that meets engineering specifications.
Grading involves cut and fill operations to achieve target elevations, establishing proper drainage slopes to prevent water accumulation, compacting soil to specification densities, and installing erosion control measures like silt fencing and sediment basins.
Heavy equipment for this phase includes bulldozers for pushing and spreading material, excavators for digging and moving earth, graders for fine-leveling work, compactors for soil stabilization, and survey equipment to verify grade accuracy.
Proper grading includes establishing controlled water flow patterns and slopes away from building footprints for adequate drainage.
| Equipment Type | Primary Function | Am besten für |
|---|---|---|
| Bulldozer | Pushing and clearing large volumes | Initial clearing, rough grading |
| Excavator | Digging and precision earthwork | Trenching, utility work, detail grading |
| Skid Steer | Versatile light-duty tasks | Small sites, tight spaces, brush clearing |
| Grader | Fine leveling and slope creation | Road base, final grade preparation |
| Compactor | Soil stabilization | Foundation prep, road base compaction |
Step 6: Conduct Final Inspections and Compliance Checks
Before construction crews arrive, the cleared site needs verification. This means inspections, testing, and sign-offs confirming the site meets all specifications and regulatory requirements.
Final inspections typically verify grade elevations match engineering plans, drainage systems function properly, erosion controls are installed and effective, all permits and environmental requirements are satisfied, and the site is safe for construction operations.
Soil compaction testing confirms the ground can support foundations and structures. Compaction specifications typically require soil stabilization to support foundations and structures, with testing to verify adequacy. Inadequate compaction leads to settling, cracking, and structural failures down the line.
Document everything. Inspection reports, test results, photos, and compliance certifications provide legal protection and prove due diligence if issues arise later.
Safety Considerations Throughout the Process
Construction site clearing is dangerous work. Heavy equipment, falling trees, unstable structures, and environmental hazards create constant risk. OSHA regulations under 29 CFR 1926 establish minimum safety standards for construction operations.
Essential safety measures include personal protective equipment requirements (hard hats, safety glasses, steel-toed boots, high-visibility clothing), equipment operator certification and training, clear communication protocols and spotters for equipment operations, daily safety briefings and hazard identification, and emergency response plans and first aid availability.
Never allow untrained personnel to operate equipment or work in hazardous areas. The few hundred dollars saved isn’t worth the lawsuit, injury, or fatality that results from cutting corners on safety.
Common Challenges and How to Handle Them
Even well-planned clearing projects hit obstacles. Here’s what commonly goes wrong and how to address it.
- Unexpected underground utilities: Despite proper marking, unmarked lines sometimes exist. Stop work immediately if equipment strikes anything unexpected. Contact utility companies before proceeding.
- Contaminated soil: Discovering contaminated soil mid-project halts everything. Environmental testing during initial surveys prevents this. If contamination is found, specialized remediation may be required under EPA guidance for hazardous waste cleanups.
- Protected species or wetlands: Environmental assessments should identify these before work begins. Discovering protected areas mid-project can require redesign or abandonment of the site.
- Weather delays: Rain turns cleared soil into mud, prevents compaction, and causes erosion. Plan for weather contingencies and have erosion controls ready before storms hit.
Moving Forward with Site Clearing
Clearing a construction site properly sets every subsequent phase up for success. It’s not the glamorous part of building, but it’s where projects either establish solid footing or inherit problems that compound through every phase that follows.
The process requires planning, proper equipment, regulatory compliance, and attention to safety. Cutting corners saves neither time nor money—it just shifts costs to later phases where they’re more expensive to address.
Whether hiring professionals or tackling smaller projects independently, understanding the full scope of site clearing ensures realistic budgets, accurate timelines, and foundations built on stable ground rather than buried problems waiting to surface.
Start with thorough surveys. Secure proper permits. Follow safety protocols. Document everything. And recognize when professional expertise is worth the investment.
Häufig gestellte Fragen
Do I need permits to clear my land for construction?
Most jurisdictions require land disturbance permits before clearing begins. Additional permits may include tree removal permits in protected areas, demolition permits for existing structures, environmental impact clearances, and erosion control permits. Requirements vary by location—check with local planning and building departments before starting work.
Can I clear land myself or do I need professionals?
Small residential projects with minimal vegetation might be DIY-feasible if proper equipment is available. But professional clearing is recommended for sites with large trees requiring specialized equipment, existing structures needing demolition, slopes and grading requirements, utility disconnections, and permit compliance needs. Equipment rental alone often costs more than hiring professionals who own the equipment and carry insurance.
What happens to debris and vegetation after clearing?
Organic materials like trees and brush are typically chipped for mulch or hauled to composting facilities. Construction debris is sorted for recycling where possible—concrete, metal, and dimensional lumber often have recycling value. Non-recyclable materials go to approved disposal facilities. Hazardous materials require specialized handling and documentation under EPA guidelines.
How much does professional site clearing cost?
Costs vary widely based on location, site size, vegetation density, and work complexity. Generally speaking, light clearing of sparse vegetation runs lower per acre than heavily wooded sites requiring extensive tree removal. Demolition adds significant cost. Difficult access, steep slopes, and special disposal requirements increase expenses. Get multiple quotes from licensed contractors with proper insurance coverage.
What equipment is needed for site clearing?
Essential equipment includes excavators or bulldozers for heavy clearing, skid steers for versatile light-duty work, chainsaws and tree-cutting equipment, stump grinders for root removal, graders for fine leveling, compactors for soil stabilization, and dump trucks for debris hauling. Specialized projects may need rock breakers, mulchers, or specialized demolition equipment.
How do I protect trees I want to keep during clearing?
Establish tree protection zones before work begins. According to Oregon State University guidelines, critical root zones extend to the tree’s drip line. Install physical barriers like fencing around protected trees. Avoid grade changes, soil compaction, or root cutting within protection zones. Brief equipment operators on protected areas and mark trees clearly with high-visibility tape or signage.

Unsere Fallstudien
Wir haben mehr als 200 BIM- und VDC-Projekte für Gewerbe, Industrie und Wohnungsbau durchgeführt.
Unsere Arbeit umfasst:
Automatisierung der Schalungsplanung
Our client from
California, USA
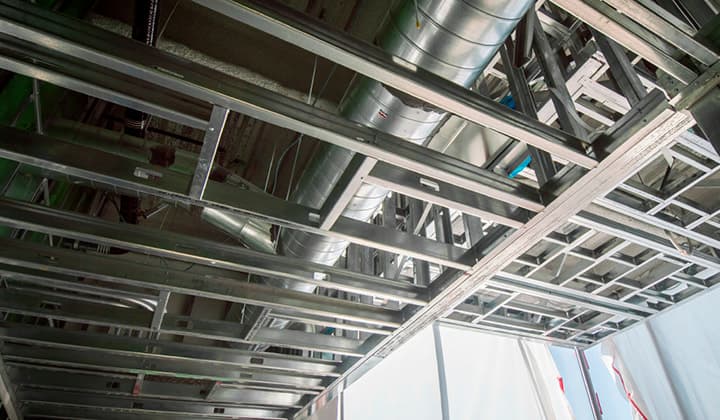
Automatisierung von abgehängten Decken
Our client from
New York, USA
Automatisierung von Wandkonstruktionen
Our client from
California, USA